When you combine the ease of a “dump and bake” dessert with the gourmet profile of a bakery-style confection, you get this Peanut Butter Cup Dump Cake. This isn’t just another quick dessert; it is a calculated masterpiece of textures. Imagine a dark, moist, and slightly gooey chocolate cake base that serves as the foundation for rivers of molten creamy peanut butter and a dense topping of chopped Reese’s cups.
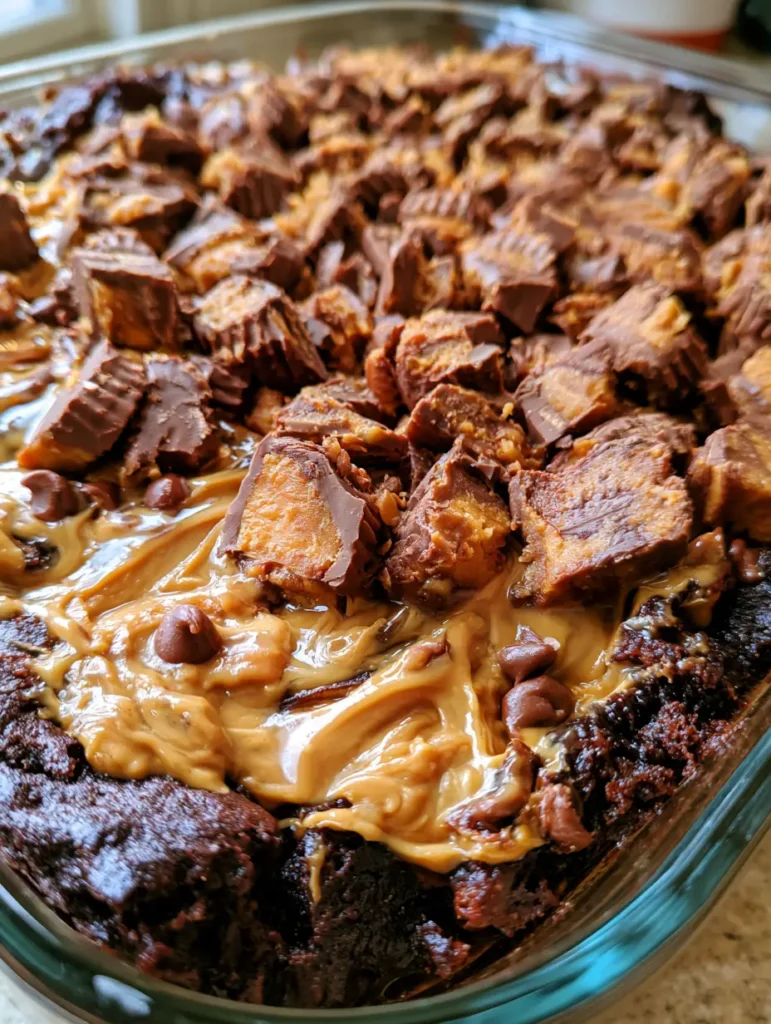
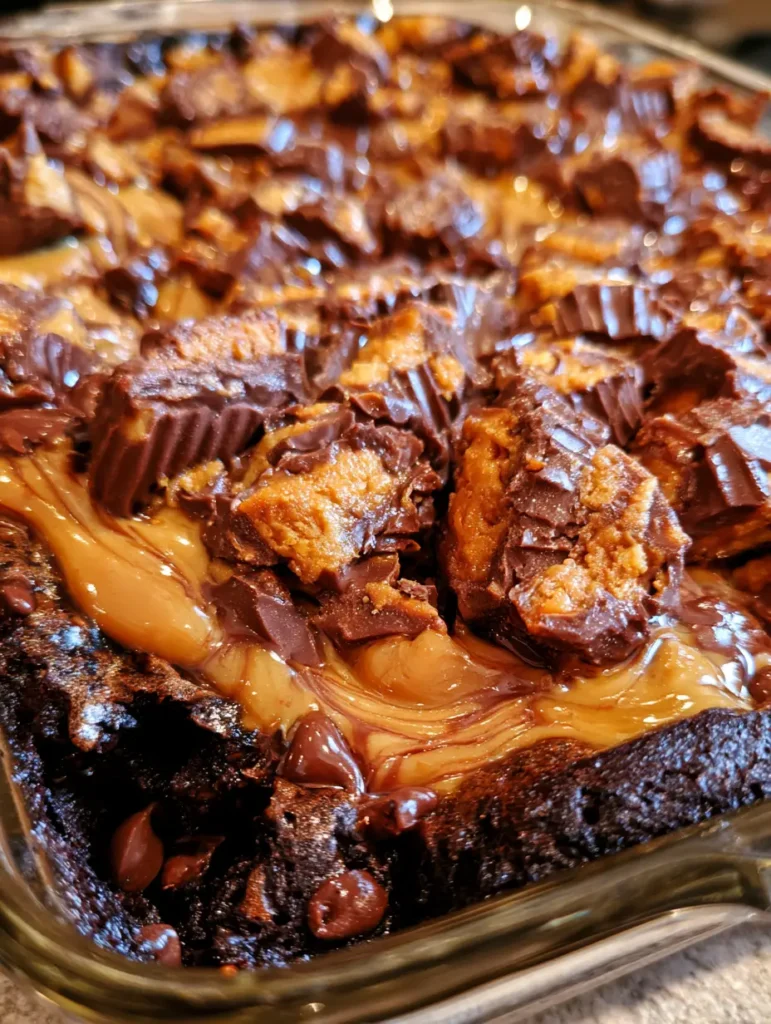
The visual appeal of this dish is undeniable, captured perfectly in a glass baking dish where the fudgy cake edges meet the semi-melted chocolate chips. This recipe is designed for the home cook who demands high-impact flavor with minimal effort. Every bite delivers a balance of salty peanut butter filling and rich milk chocolate, mirroring the iconic candy we all love.
Whether you are hosting a last-minute gathering or simply craving a decadent weeknight treat, this Peanut Butter Cup Dump Cake delivers a sensory experience that rivals any complex torte. The natural daylight hitting the thick swirls of peanut butter in your kitchen will make this the most “Instagrammable” dessert you’ve ever pulled out of the oven.
The Essential Elements for Your Chocolate Peanut Butter Fusion
- Unbelievable Texture: A gooey, dark chocolate center contrasted by set, fudgy edges.
- Visual Precision: Thick, visible swirls of melted peanut butter that stay distinct after baking.
- Layered Decadence: A dense topping of chopped Reese’s Peanut Butter Cups showing clear layers of filling and chocolate.
- Effortless Technique: No heavy mixers or complicated folding—just strategic layering for maximum flavor.
The Blueprint: Every Ingredient Needed for Gooey Success
To achieve the specific visual and structural results of this Peanut Butter Cup Dump Cake, we must select ingredients that react predictably under heat. Here is what you will need to gather for your pantry.
1 box (15.25 oz / 432g) Devil’s Food Cake Mix: This provides the dark, moist, and slightly gooey chocolate cake base required for the forensic visual match. It contains the necessary leavening agents and cocoa solids to create that deep, rich color.
2 cups (480ml) Whole Milk: Unlike water, whole milk adds fat and protein, which contributes to a more tender crumb and a fudgier mouthfeel. This is the “invisible” ingredient that transforms a dry mix into a gourmet base.
1/2 cup (115g) Unsalted Butter, melted: Butter provides the essential lipids for that “fudgy cake edge” we are looking for. It also adds a richness that oil simply cannot replicate in a dump cake format.
1 cup (250g) Creamy Peanut Butter: You want a standard commercial creamy peanut butter (like Jif or Skippy) rather than natural varieties. The stabilizers in commercial peanut butter ensure those “thick swirls” don’t just melt into the batter but remain visible and distinct.
2 cups (approx. 300g) Reese’s Peanut Butter Cups, roughly chopped: Use the standard size cups for the best visual impact. Chopping them roughly ensures you see the distinct layers of milk chocolate and peanut butter filling on the surface.
1/2 cup (90g) Semi-Sweet Chocolate Chips: These small semi-melted chocolate chips scattered throughout provide bursts of intense chocolate flavor and varied texture. If you love deep chocolate, you might also enjoy our midnight fudge cake.
1/2 tsp (3g) Sea Salt: A foundational ingredient that heightens the contrast between the sugar in the cake and the saltiness of the peanut butter.
The Precision Tools for a Perfect Bake
To replicate the visual prompt of a “handheld smartphone photo in a glass baking dish,” the equipment is just as important as the ingredients. Using the right vessel ensures the heat distribution creates those coveted fudgy edges.
9×13 inch (23x33cm) Glass Baking Dish: Glass conducts heat more slowly than metal, which is the secret to getting a cake that is set at the edges while remaining gooey in the center. It also allows you to see the layers from the side.
Offset Spatula or Small Knife: This is essential for creating the “thick swirls” of peanut butter. You want to drag the peanut butter through the top layer of the cake mix without fully incorporating it.
Microwave-Safe Bowl: You will need this to gently warm the peanut butter, making it fluid enough to swirl but thick enough to retain its shape.
The Master Plan: Step-by-Step to Fudgy Perfection
Preparing the Dark Chocolate Foundation
Preheat your oven to 350°F (175°C). Grease your glass baking dish lightly with butter or non-stick spray. Pour the dry Devil’s Food cake mix into the dish, spreading it into an even layer.
Slowly pour the 2 cups (480ml) of milk and the melted butter over the dry mix. Use a whisk or a fork to gently combine the liquid with the powder directly in the dish. You aren’t looking for a perfectly smooth batter—small lumps are fine and contribute to the “moist and gooey” texture once baked.
The Art of the Peanut Butter Swirl
Place your creamy peanut butter in a microwave-safe bowl and heat for 20-30 seconds until it reaches a pourable consistency. Using a spoon, drop large dollops of the warm peanut butter across the surface of the chocolate batter.
Take your offset spatula or a butter knife and gently swirl the peanut butter into the top inch of the batter. Do not over-mix; the goal is to see thick, distinct “rivers” of peanut butter against the dark chocolate backdrop. This is a crucial step for achieving the visual recipe blueprint.
Layering the Textural Elements
Take your roughly chopped Reese’s Peanut Butter Cups and distribute them generously over the top. Ensure some pieces are skin-side up and others show the “peanut butter filling” layer. This creates the dense topping described in the prompt.
Finally, scatter the semi-sweet chocolate chips into the gaps. These will become the “small semi-melted chocolate chips” that dot the surface, adding a glossy finish to the final look.
Baking for Sensory Cues
Slide the dish into the center rack of the oven. Bake for 35-40 minutes. Watch for the visual changes: the edges of the cake should look “slightly set and fudgy,” while the center should still have a slight jiggle if you shake the pan gently.
Listen for a faint bubbling sound around the perimeter of the dish—this indicates the sugars are caramelizing against the glass. The smell of roasted peanuts and warm cocoa should fill your kitchen. Remove from the oven while the center still looks “moist” to ensure it remains gooey once cooled.
Expert Tips for a Professional Result
- Temperature Control: Ensure your milk is at room temperature before mixing. Cold milk can cause the melted butter to seize, resulting in an uneven “moist and gooey” texture.
- The Swirl Technique: When swirling the peanut butter, use a “figure-eight” motion. This creates the most visually appealing patterns that don’t disappear into the cake base.
- Don’t Over-Bake: This is the most common mistake. Because it’s a “dump cake,” it will firm up significantly as it cools. If a toothpick comes out completely clean, you’ve gone too far!
- Chop Size Matters: Keep your peanut butter cup chunks relatively large (about 1/2 inch). Small crumbs will melt away, losing the “distinct layers” look.
Maximizing Your Dessert Experience: Serving Suggestions
The richness of the Peanut Butter Cup Dump Cake calls for a strategic pairing. To cut through the density of the fudgy edges, serve a warm scoop alongside a cold glass of milk or a dollop of unsweetened whipped cream.
If you are looking for a full comfort-food menu, this cake follows beautifully after a savory meal like our Amish hamburger casserole or a batch of garlic butter fried gnocchi. For those who love a sweet-and-salty contrast, a side of butter swim biscuits can actually act as a surprising and delicious vessel for the gooey cake center.
Preserving the Goo: Storage and Reheating
At Room Temperature: Cover the glass dish tightly with plastic wrap or foil. The cake will stay moist for up to 3 days. The high sugar and fat content from the peanut butter act as natural preservatives.
In the Refrigerator: If you prefer a firmer, more fudge-like texture, store it in the fridge for up to 5 days. This makes the “fudgy edges” even more dense and chewy.
Reheating: To restore the “melted” quality of the chocolate chips and peanut butter swirls, microwave a single serving for 15-20 seconds. This brings back the “gooey” chocolate base texture perfectly.
Your Questions Answered
Natural peanut butter tends to separate and oil off during baking. For the ‘thick, distinct swirls’ in the blueprint, a stabilized commercial creamy peanut butter is recommended.
Yes, unlike fruit-based dump cakes, a chocolate cake mix needs to be gently combined with the liquid to ensure the cocoa hydrates properly and creates a fudgy texture.
Wait to add the chopped Reese’s cups until after you have swirled the peanut butter into the top layer of the batter. The batter’s thickness will support the candy pieces.
Chill the Reese’s cups in the fridge for 20 minutes before chopping. This prevents the chocolate from melting in your hands and ensures clean, distinct layers are visible.
This usually happens if you use water instead of milk or over-bake the cake. For the ‘moist and gooey’ result shown, ensure you pull it out while the center still has a slight jiggle.
The Official Peanut Butter Cup Dump Cake Recipe
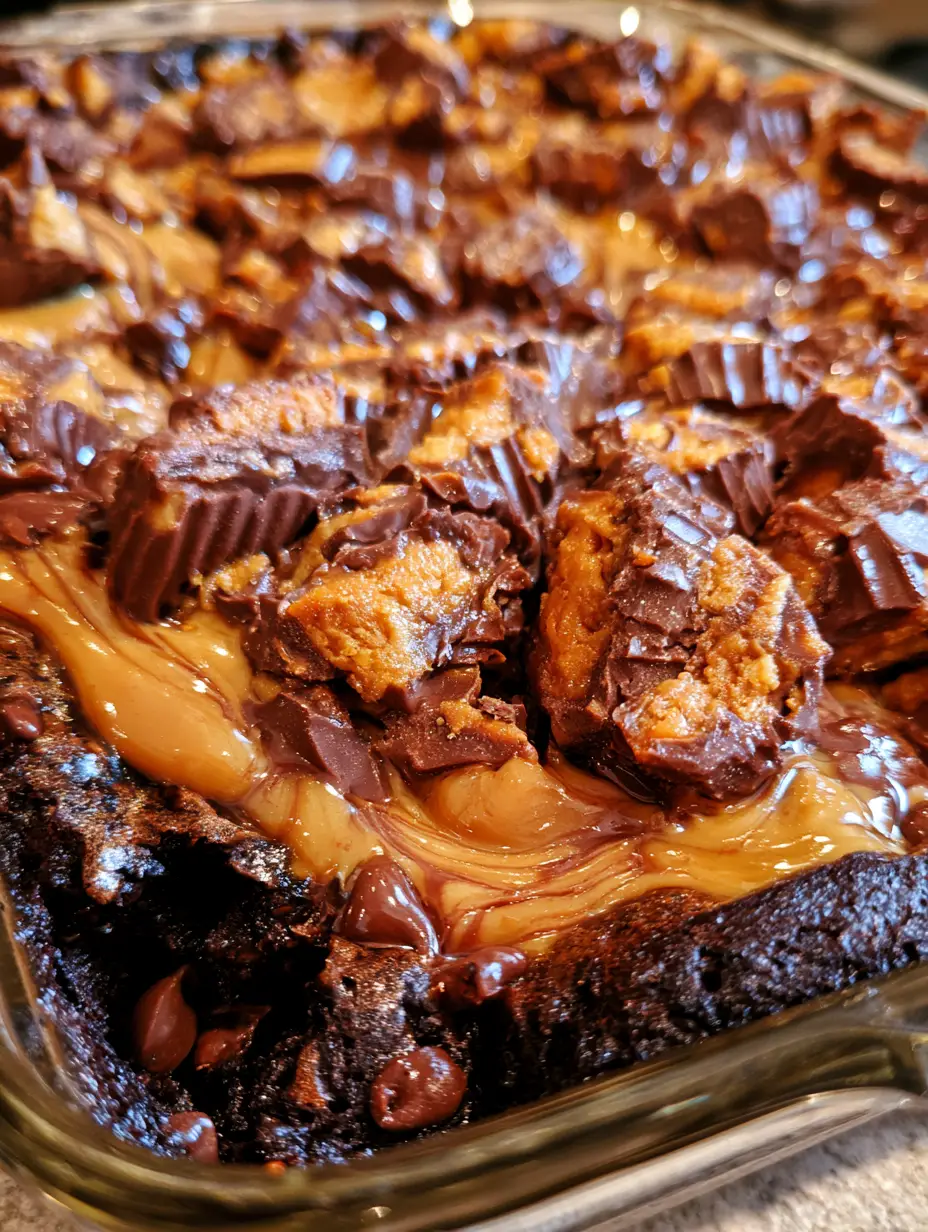
Peanut Butter Cup Dump Cake: The Ultimate Fudgy Chocolate Overload
Ingredients
Equipment
Method
- Preheat oven to 350°F (175°C). In a 9x13 inch glass baking dish, combine the dry cake mix, milk, and melted butter until a moist, thick batter forms.
- Warm the peanut butter in the microwave. Drop dollops onto the batter and use an offset spatula to create thick swirls in the top layer.
- Evenly distribute the chopped Reese's cups and chocolate chips over the surface.
- Bake for 35-40 minutes until the edges are fudgy and set, but the center remains slightly gooey.
Notes
Use commercial creamy peanut butter for the best swirls.
Closing & Call to Action
This Peanut Butter Cup Dump Cake is the ultimate intersection of convenience and culinary indulgence. By following the specific layering techniques and looking for the sensory cues of a gooey center and fudgy edges, you can create a dessert that looks exactly like a professional food photograph. Don’t forget to snap your own smartphone photo before diving in!
If you enjoyed this recipe, please leave a comment below and let us know how your swirls turned out! For more decadent dessert inspiration and easy weeknight meals, follow us on Pinterest and share this recipe with your fellow chocolate lovers.