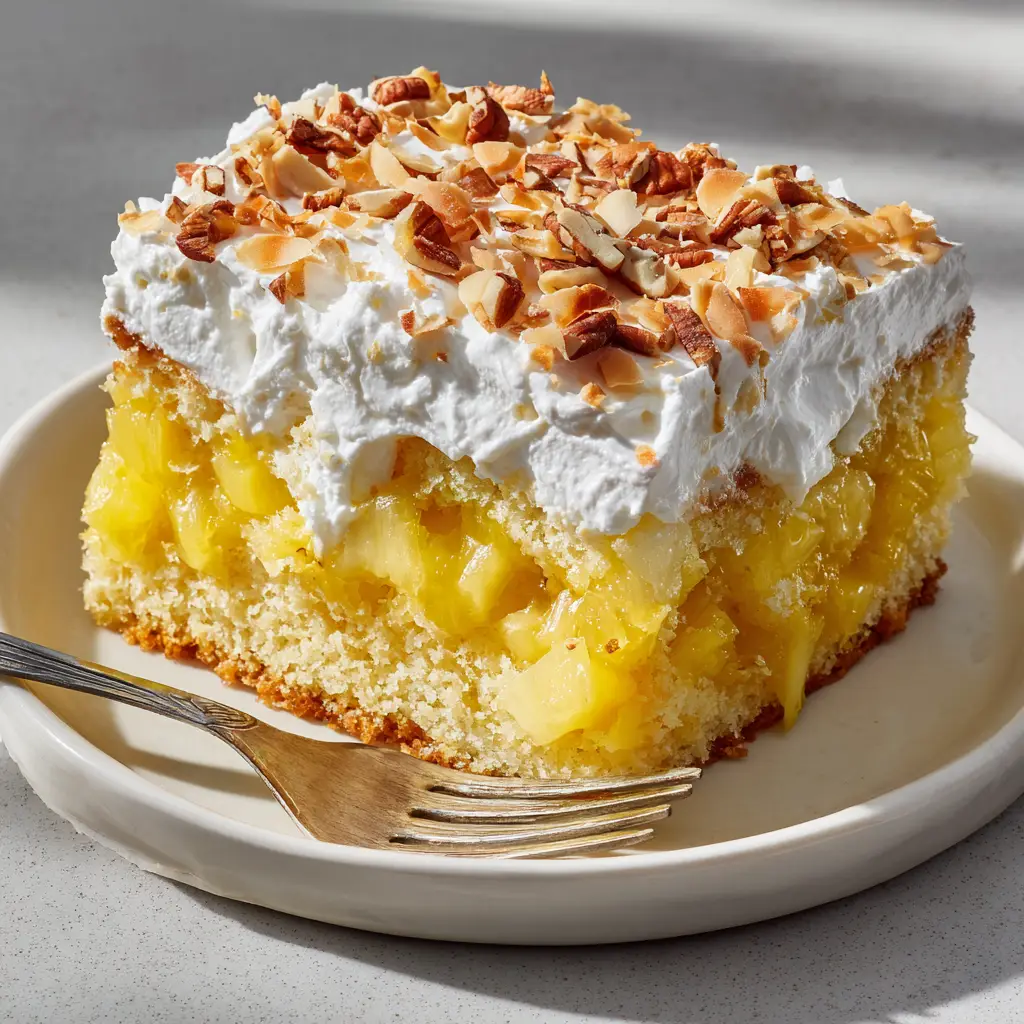
There is nothing quite like a slice of Pineapple Heaven Cake resting perfectly on a small white dessert plate to make your mouth water. If you crave a dessert that balances vibrant, tropical fruitiness with a rich, comforting crumb, you have found the holy grail of baking. This recipe delivers a moist, spongy yellow cake base that practically melts in your mouth.
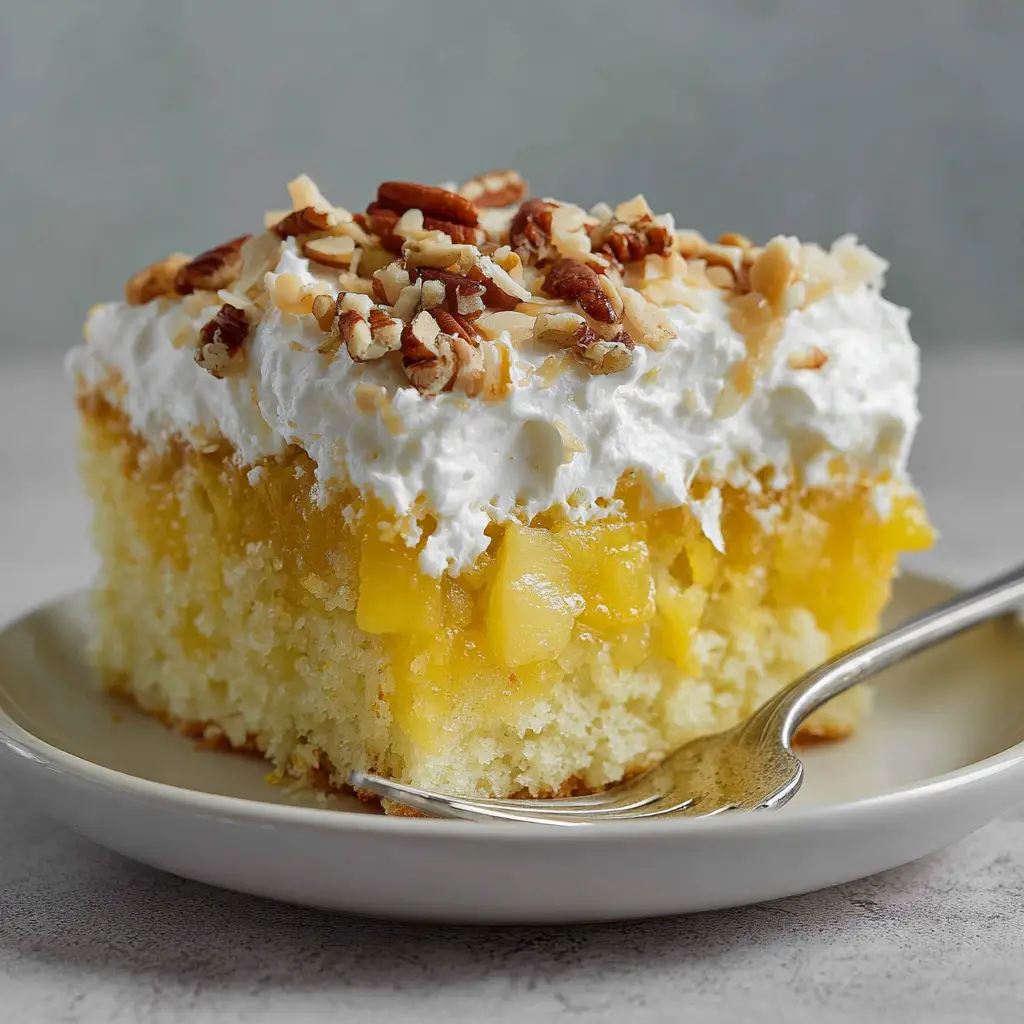
What truly sets this masterpiece apart is the glossy layer of crushed yellow pineapple chunks, sitting right in its own juices and thoroughly soaking the warm cake. Every bite yields a rush of sweet, tangy moisture that elevates the simple sponge into a decadent treat. This method essentially creates a classic poke cake, but refined for maximum sensory impact.
To crown it all, a thick, airy layer of fluffy white whipped cream frosting sits generously over the pineapple. This cloud-like topping is then heavily sprinkled with finely chopped toasted pecans, adding the perfect nutty crunch to contrast the soft, juice-soaked layers below. Grab your favorite silver dessert fork—you are going to need it.
Why You’ll Love This Recipe
- Unmatched Moisture: By pouring the crushed pineapple and its juices directly over the warm cake, the sponge absorbs every drop of tropical flavor.
- Incredible Texture Contrast: The thick, airy whipped cream and crunchy toasted pecans perfectly balance the soft, wet crumb of the cake.
- Visually Stunning: The distinct layers of golden sponge, glossy yellow pineapple, and stark white whipped cream make for a beautifully unedited, photo-ready slice.
- Crowd-Pleasing Simplicity: Despite looking like a complicated bakery showstopper, the foundation relies on straightforward, accessible culinary techniques.
Ingredients & Substitutions
To achieve the exact textures described, we rely on a precise balance of foundational baking ingredients and fresh, bold flavors.
All-Purpose Flour: You will need 1 ½ cups (190g) of standard all-purpose flour to provide the structural backbone of the sponge cake. It balances tenderness with enough strength to hold the juicy pineapple topping without collapsing.
Granulated Sugar: We use 1 cup (200g) of white sugar to sweeten the cake base and aid in creating a beautifully browned, slightly crisp top edge. The sugar also locks in moisture during the baking process.
Baking Powder & Salt: Use 1 ½ tsp (6g) of baking powder and ½ tsp (3g) of kosher salt. The baking powder is the invisible lift required to make the yellow cake spongy and airy, while salt enhances all the surrounding flavors.
Unsalted Butter: You need ½ cup (113g) of softened unsalted butter. Creaming the butter provides a rich, classic yellow cake flavor and a tender crumb that eagerly drinks up the pineapple juice.
Large Eggs: Incorporate 2 large room-temperature eggs. Eggs provide the essential fat and emulsification needed to bind the batter into a smooth, cohesive sponge.
Whole Milk & Vanilla Extract: Use ½ cup (120ml) of whole milk and 1 tbsp (15ml) of pure vanilla extract. The milk thins the batter to the perfect consistency, while the vanilla acts as an aromatic baseline for the tropical pineapple.
Crushed Pineapple in Juice: You will need 1 large can (20 oz / 567g) of crushed yellow pineapple in its own juice. Do not drain this; the juice is required to soak into the sponge and create the signature glossy layer.
Heavy Whipping Cream: Use 2 cups (480ml) of cold heavy whipping cream for the frosting. When whipped, it transforms into the thick, fluffy white layer that crowns the dessert.
Powdered Sugar: We add ½ cup (60g) of powdered sugar to the heavy cream. This lightly sweetens the frosting and contains a touch of cornstarch to help stabilize the whipped peaks.
Toasted Pecans: Finally, gather ½ cup (60g) of finely chopped toasted pecans. Toasting the nuts releases their natural oils, providing a deep, roasted flavor that cuts through the sweetness of the fruit and cream.
Equipment Needed
- 9×13-inch metal or glass baking pan.
- Electric hand mixer or stand mixer (essential for whipping the cream to stiff peaks).
- A wooden skewer or the handle of a wooden spoon (for poking holes in the cake).
- Large mixing bowls and a rubber spatula.
Step-by-Step Instructions
1. Prepare the Batter and Bake the Sponge Cake
Preheat your oven to 350°F (175°C). Lightly grease your 9×13-inch baking pan with non-stick cooking spray or a thin layer of butter.
In a large bowl, use an electric mixer to cream the softened butter and granulated sugar together for 3-4 minutes. You are looking for a pale, fluffy texture which signals that enough air has been incorporated for a light crumb.
Beat in the eggs one at a time, ensuring each is fully mixed before adding the next, then blend in the vanilla extract. In a separate bowl, whisk together the flour, baking powder, and salt.
Gradually add the dry ingredients to the wet mixture, alternating with the whole milk. Mix just until combined; overmixing will result in a dense cake rather than the desired moist sponge.
Pour the batter into the prepared pan and smooth the top. Bake for 25-30 minutes. Visual Cue: The cake is done when the edges are a deep golden-brown and the center springs back slightly when gently pressed.
2. Execute the Glossy Pineapple Soak
Remove the cake from the oven and let it cool in the pan for exactly 10 minutes. It must still be quite warm for the soaking phase to work properly.
Using a wooden skewer or the round handle of a wooden spoon, carefully poke holes all over the surface of the cake, spacing them about an inch apart. Do not poke all the way through to the very bottom to prevent the cake from becoming completely soggy.
Open your can of crushed pineapple and pour the entire contents—both the fruit chunks and the liquid juice—evenly over the warm cake. Use a spatula to spread the crushed pineapple so it creates a uniform, glossy yellow layer across the surface.
Allow the cake to cool completely to room temperature. This cooling period allows the sponge to thoroughly drink up the juices and set up properly.
3. Whip the Fluffy White Frosting
Once the cake is completely cool, prepare the topping. Pour the cold heavy whipping cream into a large, chilled mixing bowl.
Using an electric mixer on medium-high speed, whip the cream until soft peaks begin to form. Gradually add in the powdered sugar while continuing to mix.
Whip until stiff peaks form. Visual Cue: The cream should look thick, voluminous, and hold its shape firmly when you lift the beaters out. Do not overwhip, or it will turn into butter.
4. Assemble and Garnish
Spoon the thick, airy whipped cream directly over the cooled, glossy pineapple layer. Use an offset spatula to spread it gently from edge to edge, creating sweeping swoops for a homemade bakery look.
Take your finely chopped toasted pecans and generously sprinkle them over the top of the fluffy white frosting.
Cover the baking dish loosely with plastic wrap and refrigerate for at least 2 hours before slicing. Chilling ensures the whipped cream sets and the juices fully integrate into the cake base.
Expert Tips for Success
- Do Not Drain the Pineapple: The entire magic of this recipe lies in the natural juices of the crushed pineapple acting as the soaking liquid. Discarding it will result in a dry cake.
- Chill Your Bowl and Beaters: For the thickest, fluffiest whipped cream, place your metal mixing bowl and beaters in the freezer for 15 minutes before whipping the heavy cream.
- Toast the Nuts: Raw pecans lack depth. Toasting them in a dry skillet over medium heat for 3-5 minutes until fragrant makes a massive difference in the final flavor profile.
- Poke Gently: When poking holes in the warm sponge, go about ¾ of the way down. Poking to the absolute bottom can cause the cake to stick aggressively to the pan.
Storage & Reheating/Freezing
Because this cake contains fresh whipped cream and a highly moist fruit layer, it must be stored in the refrigerator. Keep it tightly covered with plastic wrap or a secure lid. It will stay fresh and delicious for up to 4 days. The moisture actually improves on the second day!
Freezing is not highly recommended for the fully assembled cake, as the whipped cream can become grainy and weep when thawed. However, you can freeze the baked and pineapple-soaked cake (without the whipped cream) for up to 2 months. Thaw overnight in the fridge and add fresh whipped cream before serving.
What to Serve With This
This light, fruit-forward dessert is incredibly versatile and serves as the ultimate finale to virtually any meal. If you’re hosting a cozy weekend dinner, follow up a hearty main course like classic beef stew, slow cooker french dip, or rich italian sausage stuffed shells with a slice of this heavenly cake to cut through the richness.
For a summer cookout or barbecue, Pineapple Heaven Cake is a mandatory addition. Serve it alongside honey bbq chicken rice, garlic parmesan cheeseburgers, and a crunchy cowboy cabbage salad. The tropical flavors also naturally complement dishes like coconut broth clams and jamaican brown stew chicken.
If you’re building a massive dessert spread for a party, pair this vibrant cake with contrasting chocolate and caramel treats. It looks gorgeous sitting on a table next to a decadent oreo lasagna, a turtle brownie cheesecake, or fun samoas pie recipe slices.
Frequently Asked Questions
Yes! In fact, making it a day ahead is ideal. Giving the cake 12 to 24 hours in the refrigerator allows the pineapple juices to fully permeate the sponge cake, resulting in an incredibly moist crumb.
It is highly recommended to use canned crushed pineapple in juice for this recipe. Canned pineapple provides the exact liquid-to-fruit ratio needed to properly soak the cake, whereas fresh pineapple can vary greatly in moisture and acidity.
No. While finely chopped toasted pecans provide a traditional and delicious crunch, you can substitute them with toasted walnuts, macadamia nuts, or even toasted coconut flakes if you prefer a nut-free or extra tropical variation.
Because of the fresh whipped cream and fruit juice layers, this cake must be stored in the refrigerator. Keep it tightly covered with plastic wrap, and it will stay fresh for up to 4 days.
Whipped cream will melt if spread onto a cake that is still warm. Ensure the pineapple-soaked sponge has completely cooled to room temperature before applying the fluffy white whipped cream frosting.
Closing Thoughts
This Pineapple Heaven Cake perfectly captures the magic of a vintage, fruit-soaked dessert while remaining unbelievably easy to execute in a modern kitchen. From the moist, juicy crumb to the fluffy peaks of fresh cream and toasted pecans, every bite is a textural triumph.
If you try this recipe, please leave a comment and a rating below—we love hearing how it turned out for you! Don’t forget to subscribe to our newsletter for more incredible dessert inspirations, and save this recipe for your next gathering.

Recipe Card
The Ultimate Pineapple Heaven Cake Recipe
Ingredients
Equipment
Method
- Preheat your oven to 350°F (175°C). Lightly grease your 9x13-inch baking pan.
- In a large bowl, cream the softened butter and granulated sugar together for 3-4 minutes until pale and fluffy.
- Beat in the eggs one at a time, then blend in the vanilla extract.
- Whisk together the flour, baking powder, and salt. Gradually add the dry ingredients to the wet mixture, alternating with the whole milk. Mix just until combined.
- Pour the batter into the pan and bake for 25-30 minutes until edges are golden-brown.
- Let the cake cool for 10 minutes. Using a skewer, poke holes evenly across the warm cake.
- Pour the entire can of crushed pineapple and its juices over the warm cake. Spread into an even, glossy layer. Let cool completely.
- Whip the cold heavy whipping cream and powdered sugar until stiff, fluffy peaks form.
- Spread the whipped cream over the cooled pineapple layer. Sprinkle generously with finely chopped toasted pecans. Chill for 2 hours before serving.
Notes
Toast the pecans in a dry skillet for 3-5 minutes for optimal flavor.