There is nothing quite like sinking your teeth into perfect Thai peanut chicken wraps. This recipe delivers a restaurant-quality experience right in your own kitchen, balancing rich, savory flavors with incredible fresh crunch. The star of the show is the dense filling, tightly packed inside a thin, soft flour tortilla.
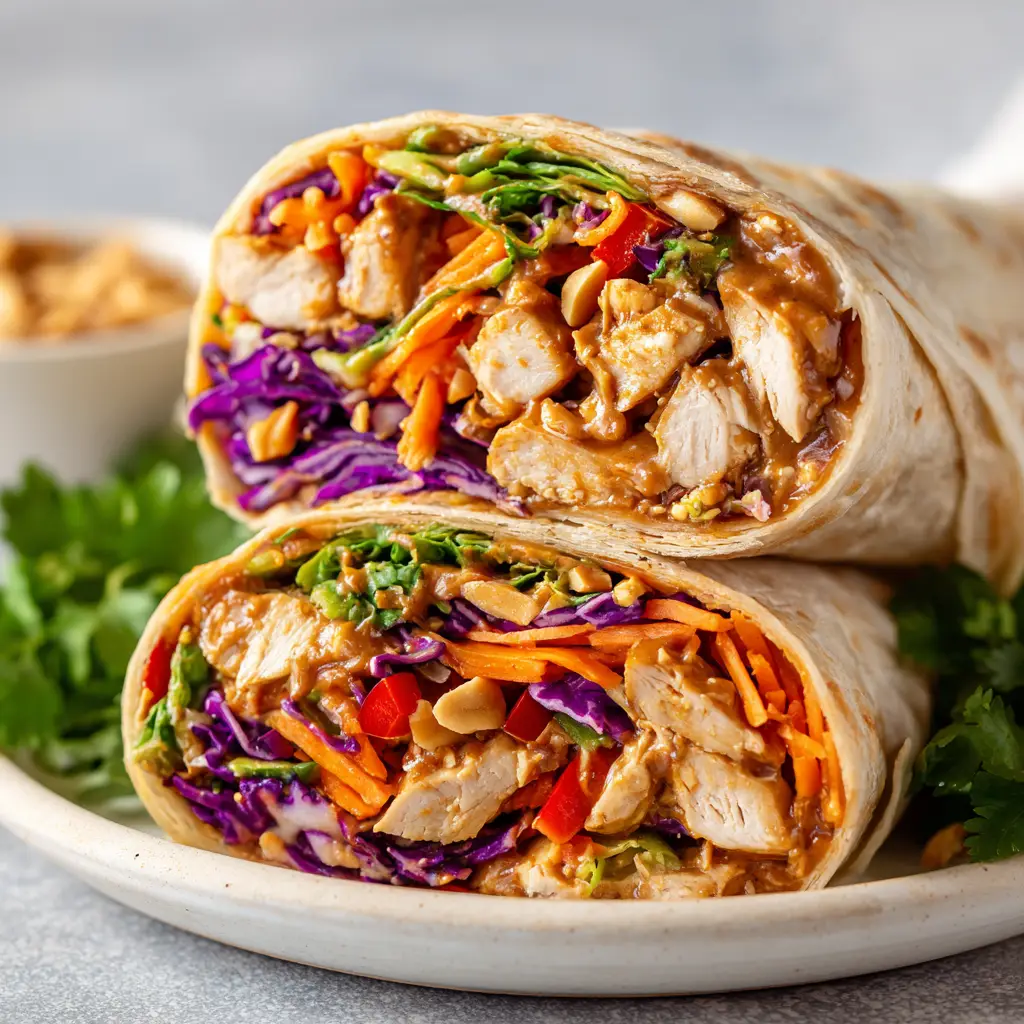
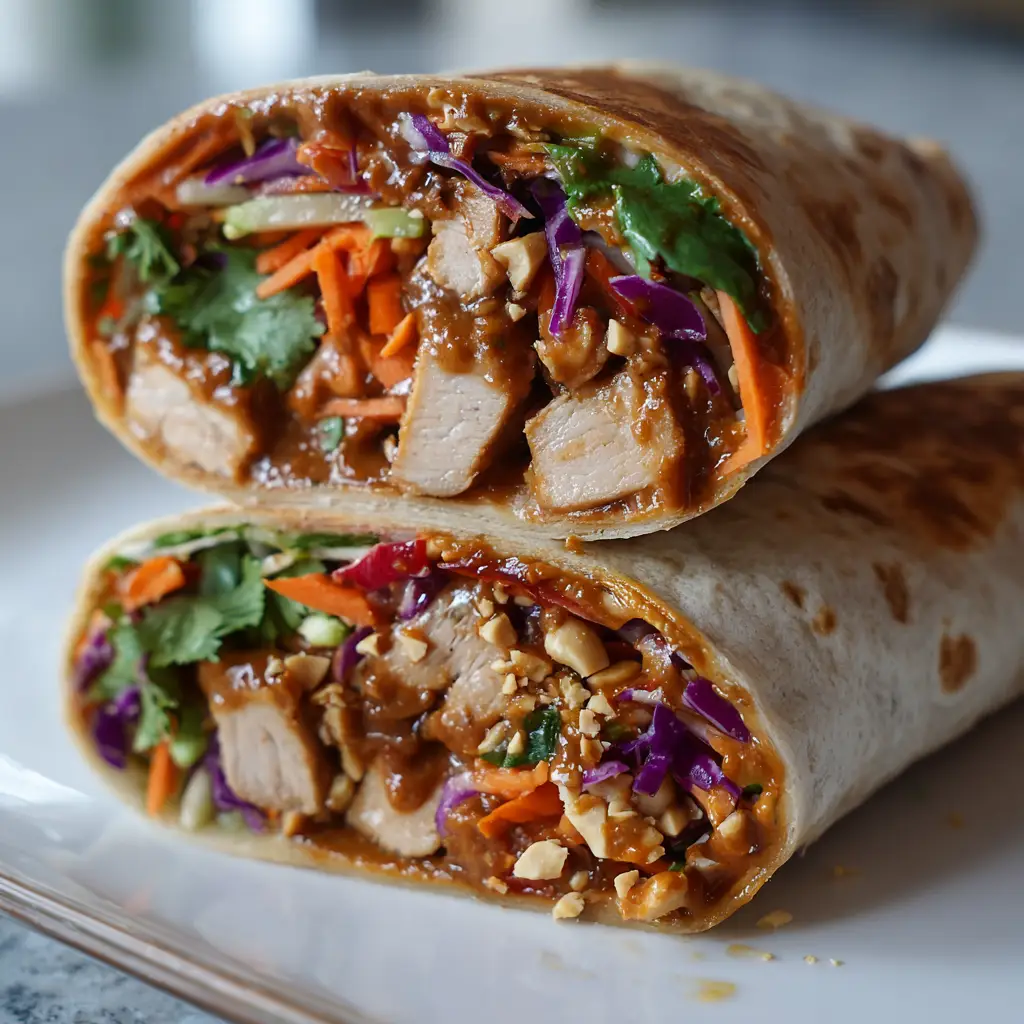
When you slice these wraps cleanly in half, the cross-section is a visual masterpiece. You will immediately notice distinct layers of vibrant, raw vegetables contrasting perfectly against chunks of grilled chicken breast. That chicken is heavily coated in a thick, glossy brown peanut sauce that clings to every single bite.
Whether you are meal-prepping for the week or serving up a quick, satisfying dinner, this recipe hits all the right notes. It is naturally colorful, incredibly filling, and relies on simple techniques to build massive flavor. Grab your sharpest knife, and let’s get rolling!
Why You’ll Love This Recipe
- Incredible Texture Contrast: The soft flour tortilla perfectly yields to the crisp, julienned raw orange carrots and shredded raw purple cabbage.
- Visually Stunning: Slicing the wrap reveals beautiful, distinct layers of bright veggies and rich, sauce-coated chicken.
- The Ultimate Peanut Sauce: A thick, glossy brown peanut sauce binds the filling together, offering savory, sweet, and umami flavors in every bite.
- Hidden Crunches: Crushed roasted peanuts are explicitly mixed into the glossy sauce, offering unexpected textural pops.
Ingredients & Substitutions
Soft Flour Tortillas: You will need 4 large (10-inch / 25cm) soft flour tortillas for this recipe. Warming them slightly ensures they remain pliable enough to tightly wrap the dense filling without tearing.
Chicken Breast: Use 1 lb (450g) of boneless, skinless chicken breast. Grilling the chicken creates a firm texture that is easily chopped into the necessary chunks.
Olive Oil, Salt & Pepper: Use 1 tbsp (15ml) of olive oil, plus a pinch of salt and pepper, to sear the chicken. This invisible foundation ensures a deep golden-brown crust forms on the meat.
Creamy Peanut Butter: Start with 1/2 cup (120ml) of standard creamy peanut butter to build your sauce. Avoid natural, oily peanut butters, as they will not achieve the required thick, glossy texture.
Soy Sauce & Hoisin: Add 2 tbsp (30ml) each of soy sauce and hoisin. These essential liquids provide the umami depth and that signature glossy brown color.
Rice Vinegar & Sesame Oil: Incorporate 1 tbsp (15ml) of rice vinegar and 1 tbsp (15ml) of sesame oil. These balance the richness of the peanut butter while thinning the sauce to the perfect clinging consistency.
Garlic & Ginger: Mince 1 tsp (5g) each of fresh garlic and ginger. This acts as the invisible aromatic backbone of your flavorful dressing.
Raw Orange Carrots: Prepare 1 cup (100g) of julienned raw orange carrots. Their bright orange hue and satisfying snap are crucial for the layered cross-section.
Raw Purple Cabbage: Shred 1 cup (70g) of raw purple cabbage. This vibrant ingredient provides a stark, beautiful color contrast against the dark brown chicken.
Red Bell Pepper: Slice 1 medium red bell pepper into thin strips. The red strips add a sweet, juicy bite to the dense veggie filling.
Fresh Green Cilantro: Use 1/4 cup (15g) of finely chopped fresh green cilantro leaves. The bright green flecks bring an essential herbal freshness.
Roasted Peanuts: Crush 1/4 cup (35g) of roasted peanuts. These are visibly mixed right into the glossy sauce to provide deep, nutty crunches.
Equipment Needed
- Heavy Skillet or Grill Pan: Essential for developing a golden-brown crust on the chicken breasts.
- Whisk and Mixing Bowl: To emulsify the peanut sauce until it is smooth and glossy.
- Sharp Chef’s Knife: Crucial for julienning the vegetables and cutting the wraps cleanly in half without crushing the layers.
Step-by-Step Instructions
1. Prepare the Glossy Peanut Sauce
In a medium bowl, combine the creamy peanut butter, soy sauce, hoisin, rice vinegar, sesame oil, minced garlic, and minced ginger. Whisk the mixture vigorously until it emulsifies.
Visual Cue: Watch as the ingredients transform into a thick, glossy brown peanut sauce. Fold in the crushed roasted peanuts so they are visible within the sauce, then set aside.
2. Grill and Chop the Chicken
Heat the olive oil in a skillet over medium-high heat. Season the chicken breasts evenly with salt and black pepper.
Sensory Cue: Listen for a sharp sizzle as the chicken hits the pan. Sear for 5-6 minutes per side until a deep golden-brown crust forms, then let it rest before chopping into bite-sized chunks.
3. Coat the Chicken
Transfer your warm, freshly grilled chicken breast chunks into a large mixing bowl. Pour half of the prepared glossy peanut sauce over the top.
Visual Cue: Toss the mixture thoroughly until the chicken is heavily coated and glistening. The crushed peanuts should stick beautifully to the edges of the meat.
4. Assemble the Wraps
Lay a thin, soft flour tortilla flat on a clean cutting board. Spoon a generous row of the sauce-coated chicken chunks directly into the center.
Layer the bright orange julienned carrots, vibrant shredded purple cabbage, and thin strips of red bell pepper over the meat. Sprinkle the finely chopped fresh green cilantro leaves generously over the top.
5. Roll and Slice Cleanly
Fold the left and right sides of the tortilla inward over the filling. Starting from the bottom, roll the tortilla tightly upward, compressing the dense filling inside.
Visual Cue: Using your sharpest knife, cut the wrap cleanly in half. Inspect the cross-section to reveal the distinct, vibrant layers resting tightly against the saucy chicken.
Expert Tips for Success
- Warm Your Tortillas: Microwave your tortillas under a damp paper towel for 15 seconds. This makes the soft flour tortilla much easier to fold without cracking.
- Chill the Veggies: Keep your julienned carrots and shredded purple cabbage in ice water for 10 minutes before draining well. This maximizes their vibrant crunch.
- Don’t Skip the Rest: Always let your grilled chicken rest for 5 minutes before chopping. This keeps the chunks juicy and prevents soggy wraps.
- Layering Matters: Keep the heavy, wet chicken in the center and build the dry, thin strips of red bell pepper and cabbage around it to protect the tortilla.
Storage & Reheating/Freezing
These Thai peanut chicken wraps are best enjoyed fresh, but they make excellent meal prep. Store unassembled components in separate airtight containers in the fridge for up to 4 days.
If you must store pre-rolled wraps, wrap them tightly in parchment paper and then aluminum foil. Keep them refrigerated and consume within 24 hours to prevent the tortilla from getting soggy.
Freezing is not recommended for this recipe. The raw purple cabbage, bell peppers, and fresh cilantro will lose their crisp texture and turn mushy when thawed.
What to Serve With This
If you are serving these wraps for a larger dinner spread, pair them with a warm, comforting ginger miso tofu soup to start. For side dishes, an asian zucchini side dish or a heaping portion of chicken teriyaki noodles complement the rich peanut sauce perfectly.
Want a fresh, crunchy salad on the side? Try tossing some mixed greens and drizzling them generously with a sweet and tangy mango salad dressing. Finally, finish off your meal with decadent, healthy black bean brownies for a guilt-free dessert!
Frequently Asked Questions
Yes! For the best texture, store the cooked chicken, peanut sauce, and raw chopped vegetables in separate airtight containers in the fridge for up to 4 days. Assemble and wrap just before eating so the tortilla doesn’t get soggy.
While you can use natural peanut butter, it often separates and won’t yield the same thick, glossy emulsion. If you do use it, be sure to stir it extremely well before measuring and whisking.
Roll the tortilla as tightly as possible to compress the dense filling. Use a very sharp chef’s knife and slice cleanly in a swift, single downward motion rather than sawing back and forth.
To prevent tearing, gently warm your soft flour tortillas in the microwave under a damp paper towel for 10-15 seconds. This creates steam, making them pliable enough to tightly wrap the dense filling without cracking.
If your thick glossy brown peanut sauce is too stiff to coat the chicken breast chunks evenly, whisk in warm water, one teaspoon at a time, until you reach your desired consistency.
Join Our Culinary Community!
Did you fall in love with the thick, glossy brown peanut sauce in these Thai peanut chicken wraps? We want to hear about your experience! Drop a comment below and let us know how your cross-section turned out.
Don’t forget to subscribe to our newsletter for more vibrant, flavor-packed recipes delivered straight to your inbox. Pin the image below to your favorite Pinterest board so you never lose this recipe!
Recipe Card
Fresh & Crunchy Thai Peanut Chicken Wraps
Ingredients
Equipment
Method
- In a medium bowl, vigorously whisk together the creamy peanut butter, soy sauce, hoisin, rice vinegar, sesame oil, minced garlic, and minced ginger until it forms a thick, glossy brown peanut sauce. Fold in the crushed roasted peanuts so they are visible within the sauce.
- Heat the olive oil in a skillet over medium-high heat. Season the chicken breasts evenly with salt and black pepper. Sear for 5-6 minutes per side until a deep golden-brown crust forms. Let the chicken rest, then chop into bite-sized chunks.
- Transfer the warm, grilled chicken breast chunks into a large bowl. Pour half of the prepared glossy peanut sauce over the top. Toss until the chicken is heavily coated and glistening with the sauce.
- Lay a thin, soft flour tortilla flat. Spoon a row of the sauce-coated chicken chunks into the center. Layer the bright orange julienned carrots, vibrant shredded purple cabbage, and thin strips of red bell pepper over the meat. Sprinkle with finely chopped fresh green cilantro.
- Fold the left and right sides of the tortilla inward. Starting from the bottom, roll the tortilla tightly upward, compressing the dense filling. Using a sharp knife, cut the wrap cleanly in half to reveal the distinct vegetable and chicken layers.
Notes
Meal Prep Friendly: Store components separately in airtight containers for up to 4 days.