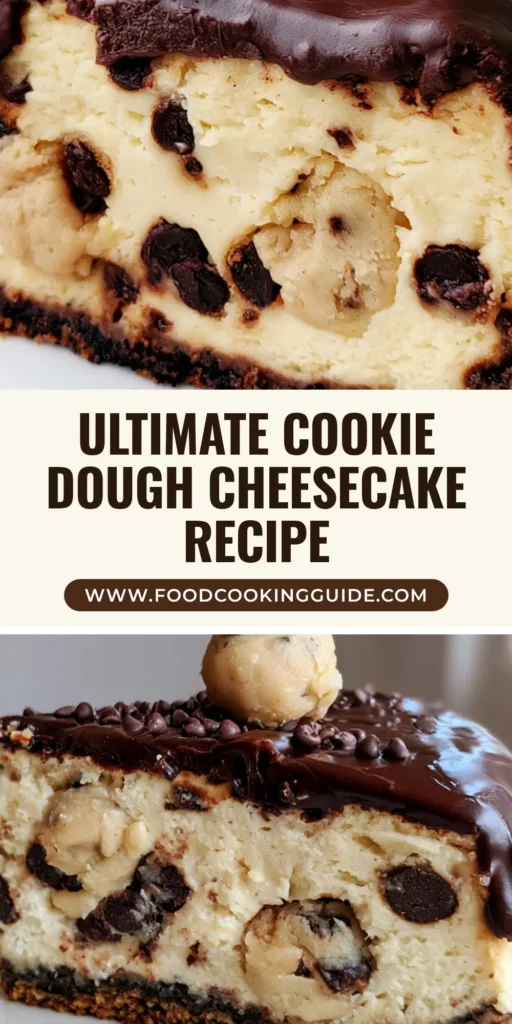
There is a specific kind of magic that happens when the nostalgic comfort of raw cookie dough meets the sophisticated, velvety texture of a New York-style dessert. This Cookie Dough Cheesecake isn’t just a recipe; it is a structural masterpiece designed to mimic the exact visual appeal of an elite, handheld smartphone food photo.
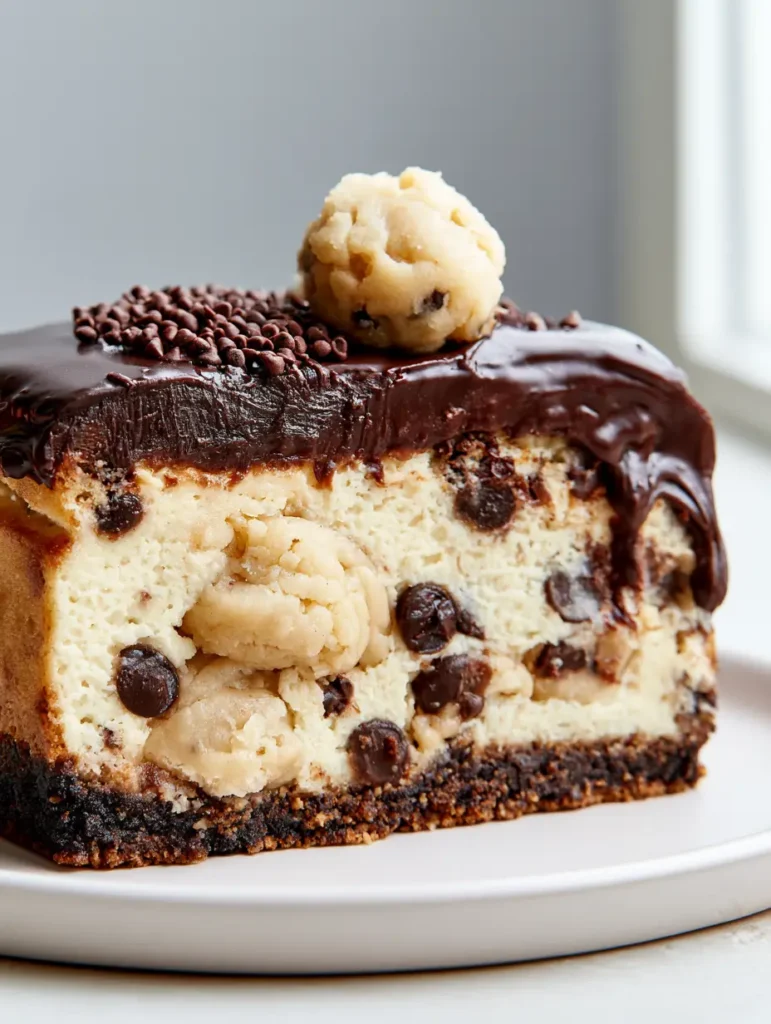
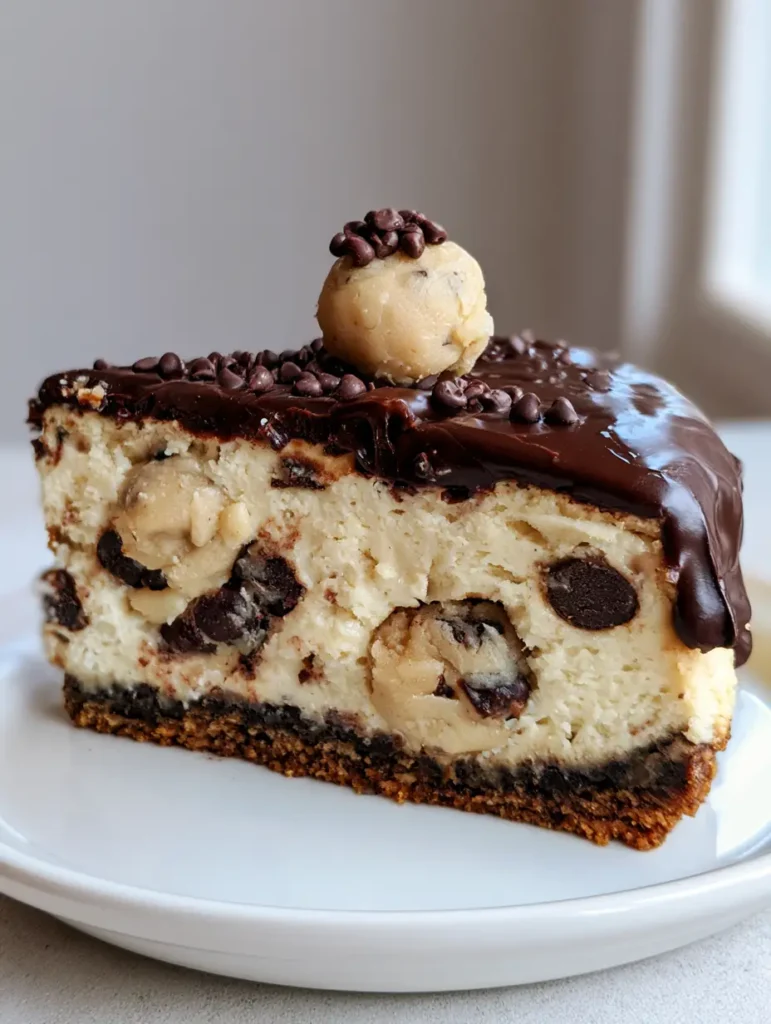
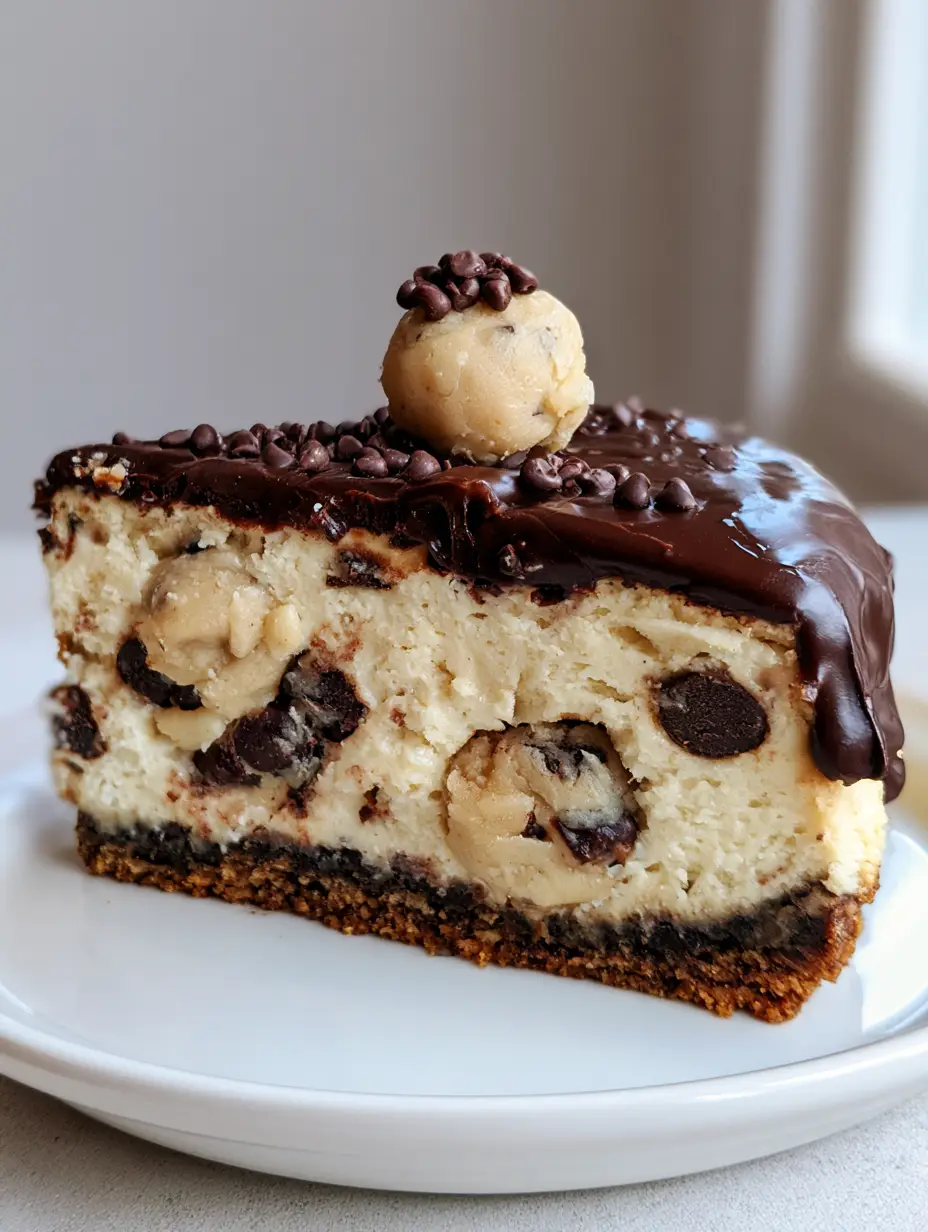
Imagine a thick, generous slice resting on a white ceramic plate, catching the soft natural daylight from a nearby window. You see a dense, creamy ivory-colored filling, studded with oversized, soft chunks of pale edible cookie dough and scattered dark semi-sweet chocolate chips.
The experience is anchored by a dark golden-brown buttery cookie crumb crust and crowned with a thick, glossy dark chocolate ganache that drips lazily down the side. To finish, a single round ball of raw cookie dough and a sprinkle of mini chocolate chips serve as the final garnish, making it look as though it came straight from a professional bakery’s Instagram feed.
The Architecture of an Elite Cookie Dough Cheesecake
- Multidimensional Texture: You get the crunch of the compressed buttery crust, the silkiness of the ivory filling, and the soft, fudgy bite of chilled edible cookie dough.
- Forensic Visual Accuracy: Every element from the dark golden base to the glossy chocolate drip is engineered for maximum aesthetic and flavor impact.
- Proven Stability: This recipe uses professional culinary science to ensure your dough chunks don’t sink to the bottom and your cheesecake doesn’t crack.
- Flavor Balance: The tang of premium cream cheese cuts through the sweetness of the brown sugar cookie dough, creating a perfectly balanced palate.
Foundational Ingredients for Structural Success
Chocolate Chip Cookie Crumbs (2 cups / 240g): We use finely ground chocolate chip cookies rather than graham crackers to reinforce the cookie dough theme from the very first bite. These provide the dark golden-brown visual for our compressed crust.
Unsalted Butter (1/2 cup / 115g): Melted butter acts as the glue for our crust, ensuring it remains compressed and buttery without crumbling when sliced. Use high-quality butter for a richer mouthfeel.
Cream Cheese (32 oz / 900g): Use only full-fat, brick-style cream cheese at room temperature. This is the secret to achieving that dense, creamy ivory-colored cheesecake filling described in our visual blueprint.
Granulated Sugar (1 cup / 200g): This sweetens the filling while allowing the ivory color to remain bright and clean, providing the perfect backdrop for the dark chips.
Sour Cream (1/2 cup / 120ml): Adding sour cream provides a subtle tang and contributes to the “dense yet creamy” texture that separates elite cheesecakes from the average.
Heat-Treated All-Purpose Flour (1 cup / 125g): For the edible cookie dough chunks, we must heat-treat the flour to ensure it is safe to consume in its “raw” state. This creates the pale, soft texture required for the inclusions.
Semi-Sweet Chocolate Chips (1.5 cups / 255g): These are scattered throughout the filling and used for the ganache. Their dark contrast against the ivory filling is a key visual requirement.
Heavy Cream (1/2 cup / 120ml): Essential for creating the thick, glossy dark chocolate ganache that produces those iconic drips down the side of the slice.
Essential Equipment for Bakery-Quality Results
To achieve the “unedited, authentic food photography style,” you need the right tools. A 9-inch (23cm) springform pan is non-negotiable for achieving those clean, thick sides. You will also need a large roasting pan to create a water bath, which prevents the top from cracking.
A high-powered stand mixer or hand mixer is necessary to aerate the cream cheese, and a kitchen scale is recommended for the most accurate Imperial and Metric conversions. Finally, a parchment paper lining for the bottom of the pan ensures your dark golden-brown crust remains intact during transfer.
Crafting the Compressed Buttery Cookie Crust
Step 1: Pulverize and Press
Preheat your oven to 325°F (163°C). Combine your 2 cups (240g) of cookie crumbs with 1/2 cup (115g) of melted butter. The mixture should feel like wet sand and hold its shape when squeezed.
Press this mixture firmly into the bottom of your lined springform pan. Use the bottom of a flat measuring cup to ensure the crust is even and highly compressed, which prevents the filling from seeping in.
Step 2: The Par-Bake
Bake the crust for 8-10 minutes. You are looking for a sensory cue of a deep, nutty aroma and a slightly darkened golden-brown edge. Remove from the oven and let it cool completely while you prepare the inclusions.
Developing the Chilled Edible Cookie Dough Chunks
Step 3: Heat-Treating the Flour
Spread your flour on a baking sheet and bake at 350°F (175°C) for 5 minutes, or until it reaches 160°F (71°C). This ensures the “raw” cookie dough ball garnish and inclusions are 100% safe to eat.
Step 4: Mixing the Pale Dough
Cream together 1/2 cup (115g) of softened butter with 1/2 cup (100g) of brown sugar. Add 1 tbsp (15ml) of milk and 1 tsp (5ml) of vanilla. Fold in your heat-treated flour and 1/2 cup (85g) of mini chocolate chips.
Roll the dough into small, irregular chunks for the filling and one perfect round ball for the garnish. Crucial Tip: Place these chunks in the freezer for at least 30 minutes. Chilled dough chunks stay intact and won’t melt into the ivory filling during the baking process.
The Science of the Ivory Cheesecake Filling
Step 5: Emulsifying the Cream Cheese
Beat the room-temperature cream cheese and sugar until completely smooth. Stop the mixer frequently to scrape the sides. You want zero lumps to maintain that “dense, creamy” visual profile.
Add 3 large eggs one at a time, followed by the sour cream and vanilla. Mix on low speed to avoid incorporating too much air; excess air causes the cheesecake to puff up and then collapse, ruining the flat surface needed for the ganache.
Step 6: Folding in the Visual Contrast
Gently fold in your frozen cookie dough chunks and 1/2 cup (85g) of semi-sweet chocolate chips. Pour the mixture over your cooled crust. The contrast between the pale dough, dark chips, and ivory batter should be immediately apparent.
Baking for Texture and Visual Perfection
Step 7: The Water Bath Method
Wrap the outside of your springform pan in double layers of heavy-duty foil to prevent leaks. Place it in a roasting pan filled with 1 inch (2.5cm) of hot water. This steam-filled environment ensures the filling remains ivory and doesn’t brown on top.
Bake for 65-75 minutes. The “Sensory Cue” to look for is the wobble: the edges should be set, but the center should still jiggle slightly like Jell-O when the pan is nudged. Turn off the oven, crack the door, and let it cool inside for one hour.
Finishing Touches: Ganache and Garnish
Step 8: The Glossy Chocolate Drip
Heat 1/2 cup (120ml) of heavy cream until simmering, then pour it over 1/2 cup (85g) of semi-sweet chocolate chips. Let it sit for 5 minutes, then whisk until it reaches a thick, glossy dark chocolate consistency.
Pour the ganache over the chilled cheesecake, using a spatula to nudge it toward the edges so it creates those beautiful, unedited drips seen in the blueprint. Place the single raw cookie dough ball and a sprinkle of mini chips in the center as the final garnish.
Expert Tips for Success
- Room Temperature is Key: Ensure your eggs and cream cheese are not cold. Cold ingredients lead to lumps that ruin the ivory filling’s smoothness.
- Don’t Overbeat the Eggs: Once the eggs go in, mix only until combined. Over-mixing leads to cracks.
- The Overnight Chill: A cheesecake is not finished when it leaves the oven. It requires at least 6-8 hours (preferably overnight) in the fridge to set into that “dense” texture.
- Clean Slices: For a professional photo look, dip your knife in hot water and wipe it clean between every single cut.
What to Serve With Cookie Dough Cheesecake
This decadent dessert is the star of the show, but it pairs beautifully with other textures. If you’re hosting a full dinner party, start with a savory main like marry me pork tenderloin or a light honey garlic shrimp to balance the richness of the dessert.
For a true dessert extravaganza, you could even serve small slices alongside a hot fudge sundae brownie cheesecake for a “cheesecake flight” experience. If you prefer a lighter side, a simple bowl of mexican potatoes during dinner provides a spicy contrast to this sweet finish.
Storage and Freezing Advice
Store your Cookie Dough Cheesecake in an airtight container in the refrigerator for up to 5 days. For longer storage, this cheesecake freezes exceptionally well. Wrap individual slices in plastic wrap and foil; they will stay fresh for up to 3 months. Thaw in the refrigerator overnight before serving to maintain the glossy ganache texture.
Frequently Asked Questions
Store-bought dough often contains raw eggs and untreated flour. For safety and the best ‘ivory’ visual results, we recommend making the quick edible dough included in this recipe.
The secret is freezing the dough chunks for at least 30-60 minutes before folding them into the cheesecake batter. This makes them denser and more resilient during the bake.
The ganache will be glossy and drippy immediately. For a firmer, sliceable texture, allow it to set in the refrigerator for 30-60 minutes before serving.
Yes! We use heat-treated flour (baked at 350°F for 5 minutes) and exclude eggs from the cookie dough chunks to ensure they are 100% food-safe.
Cracks are usually caused by over-mixing eggs or lack of moisture. Using a water bath and letting the cheesecake cool slowly in the oven prevents these common issues.
The Ultimate Cookie Dough Cheesecake Recipe
Cookie Dough Cheesecake: The Ultimate Decadent Professional Recipe
Ingredients
Equipment
Method
- Mix cookie crumbs and melted butter. Press firmly into the bottom of a 9-inch springform pan.
- Bake at 325°F (163°C) for 10 minutes until dark golden brown.
- Bake flour at 350°F (175°C) for 5 minutes to ensure safety.
- Cream butter and sugar, add flour and chips. Roll into chunks and freeze for 30 minutes.
- Beat cream cheese and sugar until smooth. Add eggs and sour cream. Fold in frozen dough chunks and chips.
- Bake in a water bath at 325°F (163°C) for 70 minutes until center jiggles slightly.
Notes
Chill the cheesecake overnight for the best texture.
Closing & Call to Action
Mastering the Cookie Dough Cheesecake is a rite of passage for any serious home baker. By following these culinary forensic steps, you aren’t just making a dessert; you’re creating a visual and sensory experience that rivals any professional bakery. We would love to see your results!
Please leave a comment below with your success stories, and don’t forget to share your handheld smartphone photos with us on Pinterest. For more decadent inspiration, sign up for our newsletter today!