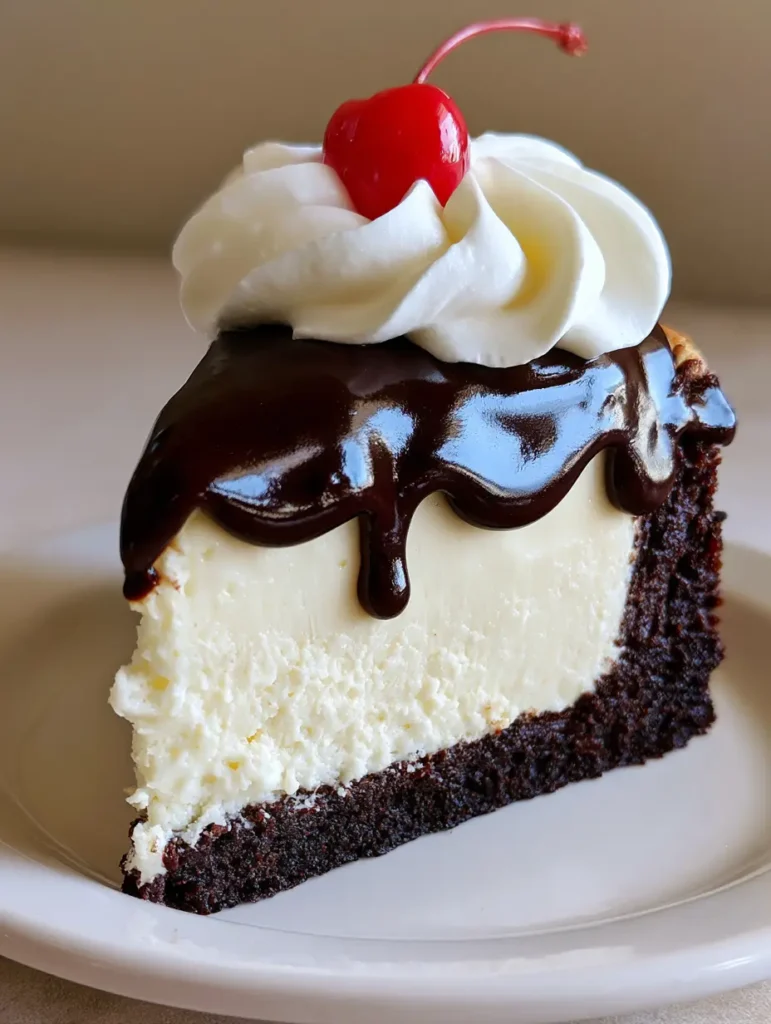
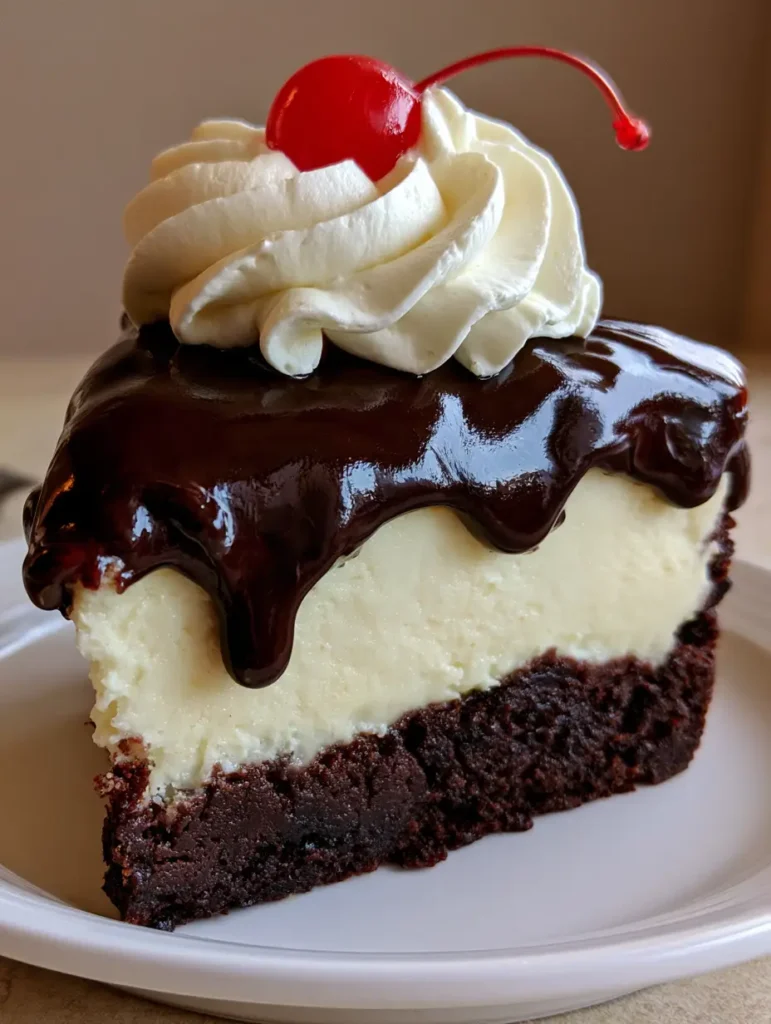
Imagine the most indulgent dessert hybrid ever conceived, captured in a single, decadent forkful. The Hot Fudge Sundae Brownie Cheesecake is not just a treat; it is a culinary architecture of textures, combining a fudgy, dense chocolate base with a towering layer of silky vanilla bean cheesecake. This show-stopping dessert is then finished with a thick, mirror-like dark chocolate fudge that pools enticingly at the base of each slice.
Every element of this recipe is designed to replicate the nostalgic joy of an ice cream parlor sundae but elevated to a sophisticated, bakehouse standard. From the stiff, decorative swirls of whipped cream to the iconic bright red maraschino cherry perched on top, this recipe delivers a professional visual result that looks exactly like a handheld smartphone photo from a high-end bakery. Whether you are hosting a celebration or simply satisfying a deep chocolate craving, this Hot Fudge Sundae Brownie Cheesecake is the definitive answer.
Achieving the perfect “pooling” effect of the fudge while maintaining the structural integrity of the tall vanilla layer requires a specific scientific approach to temperature and ingredient ratios. In this guide, we will break down the forensic details of each layer, ensuring your final product is as stable as it is beautiful. If you love deep cocoa flavors, you might also want to explore my fudgy brownie cookies for a quicker chocolate fix.
Why This Hot Fudge Sundae Brownie Cheesecake Wins Every Time
- Textural Contrast: You get the chewy, fudgy bite of a brownie paired with the melt-in-your-mouth creaminess of a premium vanilla cheesecake.
- Visual Showstopper: The contrast between the dark cocoa base, the stark white cheesecake, and the glossy black-brown fudge creates an incredible “wow” factor.
- Make-Ahead Friendly: This dessert actually improves after a night in the refrigerator, allowing the flavors to meld and the cheesecake to set perfectly.
- Professional Finish: We use specific stabilizing techniques for the whipped cream to ensure those decorative swirls stay stiff and sharp for hours.
The Essential Building Blocks for the Brownie Base
The foundation of our Hot Fudge Sundae Brownie Cheesecake must be dense enough to support the weight of the cheesecake without becoming soggy. Unlike a standard snack brownie, this base relies on a high fat-to-flour ratio to maintain its fudge-like consistency.
Unsalted Butter: 1/2 cup (115g). We melt the butter to ensure a chewy texture rather than a cakey one; butter provides the essential fat for a rich mouthfeel.
Granulated Sugar: 1 cup (200g). Sugar does more than sweeten; it helps create that classic crackly brownie top (though here it serves as the structural bond for the base).
Dutch-Processed Cocoa Powder: 1/2 cup (45g). This provides the “dark chocolate” visual described in the prompt, offering a deeper color and smoother flavor than natural cocoa.
Large Eggs: 2 units. Eggs act as the primary binder, providing the protein structure needed to hold the dense layer together under the weight of the cheese.
All-Purpose Flour: 1/2 cup (65g). A minimal amount of flour is used to ensure the base remains “dense” and “fudgy” rather than light and airy.
Fine Sea Salt: 1/4 tsp (1.5g). Salt is chemically necessary to balance the sugar and enhance the perception of the chocolate’s complexity.
Crafting the Tall and Creamy Vanilla Cheesecake Layer
The middle layer of the Hot Fudge Sundae Brownie Cheesecake needs to be “tall, smooth, and creamy” as per our visual blueprint. This requires a specific aeration technique and the use of full-fat ingredients to prevent cracking.
Full-Fat Cream Cheese: 24 oz (680g). Ensure this is at room temperature to avoid lumps; this is the primary body of our tall middle layer.
Granulated Sugar: 3/4 cup (150g). This sweetens the tang of the cheese without thinning the batter excessively.
Sour Cream: 1/2 cup (120ml). Sour cream adds a necessary silkiness and a subtle tang that cuts through the richness of the chocolate fudge.
Pure Vanilla Extract: 1 tbsp (15ml). A high volume of vanilla ensures the “vanilla cheesecake” flavor is prominent against the heavy chocolate components.
Large Eggs: 3 units. Added one at a time, these provide the lift and setting power required for a “tall” slice that holds its shape when cut.
If you find yourself obsessed with the creamy texture of this layer, you should also try my cookie dough cheesecake for a different take on the classic cream cheese filling.
The Glossy Dark Chocolate Fudge Topping
The “glossy dark chocolate hot fudge sauce that pools slightly” is the crowning jewel of this recipe. To achieve that specific shine, we utilize the science of glucose and fat emulsification.
Heavy Cream: 1/2 cup (120ml). This creates a ganache-style base that remains soft enough to “pool” even when chilled.
Dark Chocolate Chips (60% Cacao): 1 cup (170g). Using high-quality dark chocolate ensures the “glossy dark” appearance requested in the visual prompt.
Light Corn Syrup: 1 tbsp (15ml). This is the secret “invisible ingredient” that provides the permanent high-gloss finish that won’t go dull in the fridge.
Whipped Cream and Cherry Garnish Essentials
To finish the Hot Fudge Sundae Brownie Cheesecake, we need a garnish that won’t wilt. The visual blueprint calls for a “stiff whipped cream swirl.”
Heavy Whipping Cream (Cold): 1 cup (240ml). Cold fat globules are essential for trapping air and creating a stable foam.
Powdered Sugar: 2 tbsp (30g). The cornstarch present in powdered sugar acts as a stabilizer for the whipped cream.
Maraschino Cherries: 12 units. Look for cherries with stems attached to match the visual blueprint perfectly; they provide the “bright red” pop of color.
Professional Equipment for the Perfect Slice
To achieve the “thick slice” look on a “simple white ceramic plate,” you will need the right tools. A 9-inch (23cm) springform pan is non-negotiable for removing the cheesecake without damaging the sides. I also recommend a large piping bag fitted with a 1M star tip to get that “decorative swirl” of whipped cream. Finally, a sharp chef’s knife dipped in hot water between cuts is the secret to those clean, professional side views seen in the blog images.
Step-by-Step Instructions for the Brownie Base
Preparing the Fudgy Foundation
Start by preheating your oven to 325°F (165°C). Grease your 9-inch springform pan and line the bottom with parchment paper. In a medium microwave-safe bowl, melt the 1/2 cup (115g) of butter. Stir in the 1 cup (200g) of sugar and 1/2 cup (45g) of cocoa powder until a grainy paste forms.
Whisk in the 2 eggs one at a time until the batter becomes glossy and smooth. Gently fold in the 1/2 cup (65g) of flour and salt. Spread the batter evenly into the bottom of the prepared pan. Bake for 15-18 minutes just until the edges are set. The center should still be slightly underbaked, as it will continue to cook with the cheesecake layer.
Step-by-Step Instructions for the Cheesecake Layer
Creating the Tall Vanilla Middle
While the brownie base cools slightly, lower the oven temperature to 300°F (150°C). In a large bowl, beat the 24 oz (680g) of room-temperature cream cheese and 3/4 cup (150g) of sugar on medium-low speed. You want to avoid incorporating too much air, which causes cracking. Mix until perfectly smooth with no visible lumps.
Add the 1/2 cup (120ml) of sour cream and 1 tbsp (15ml) of vanilla extract. Incorporate the 3 eggs one at a time, mixing just until the yellow disappears. Pour this creamy white mixture over the brownie base. Bake for 50-60 minutes. Look for the visual cue: the edges should be set, but the center should still have a slight “jiggle” like gelatin when the pan is gently shaken.
Step-by-Step Instructions for the Glossy Fudge and Garnish
The Art of the Drip and Swirl
Once the cheesecake has chilled for at least 6 hours (preferably overnight), prepare the fudge topping. Heat the 1/2 cup (120ml) of heavy cream until it just begins to simmer. Pour it over the 1 cup (170g) of dark chocolate chips and 1 tbsp (15ml) of corn syrup. Let it sit for 2 minutes, then whisk until it is “thick, glossy, and dark.”
Pour the warm (not hot) fudge over the center of the chilled cheesecake, letting it spread naturally toward the edges so it “pools slightly.” In a separate bowl, whip the heavy cream and powdered sugar until stiff peaks form. Pipe a large, decorative swirl onto each slice. Place a single bright red maraschino cherry with a stem on top of each swirl just before serving.
Expert Tips for Success
- The Water Bath Method: For the most “smooth, creamy white” appearance, wrap the bottom of your springform pan in foil and bake the cheesecake in a larger pan filled with 1 inch of hot water. This prevents the edges from browning.
- Temperature Control: Ensure the fudge has cooled to about 90°F (32°C) before pouring. If it is too hot, it will melt the cheesecake layer; if it is too cold, it won’t pool beautifully.
- Clean Slicing: For that “close-up side view” perfection, wipe your knife clean after every single cut. The contrast between the dark brownie and white cheesecake is easily smudged.
- Cherry Prep: Pat the maraschino cherries dry with a paper towel before placing them on the whipped cream. This prevents red juice from bleeding into your pristine white swirls.
Storage, Reheating & Freezing
The Hot Fudge Sundae Brownie Cheesecake should be stored in the refrigerator in an airtight container for up to 5 days. For the best texture, let the slice sit at room temperature for 15 minutes before eating; this softens the brownie base. You can freeze the cheesecake (without the whipped cream and cherry) by wrapping individual slices tightly in plastic wrap and foil for up to 3 months. Thaw in the refrigerator overnight before garnishing.
What to Serve With This Decadent Dessert
Since this is a very rich dessert, it pairs beautifully after a savory, slightly spicy meal. Consider serving it as the grand finale to a dinner of hot honey chicken bowls or sheet pan chicken fajitas. The sweetness of the vanilla cheesecake provides a cooling contrast to the heat of the main course. If you are hosting a larger party, this cheesecake looks stunning on a dessert table alongside a midnight fudge cake for the ultimate chocolate experience.
Frequently Asked Questions
While possible, box mixes are often too airy. For the dense, supportive base required for this ‘tall’ cheesecake, the scratch-made recipe provided is recommended.
Use cold heavy cream and add powdered sugar, which contains cornstarch. Whip until the peaks are sharp and don’t droop when the whisk is lifted.
Avoid over-mixing the eggs, which incorporates air, and use a water bath during baking to provide gentle, even heat and moisture.
The cheesecake must be fully set and cold (at least 6 hours) so the warm fudge doesn’t melt the top surface and can ‘pool’ effectively.
Glossiness comes from the addition of corn syrup (glucose), which prevents sugar crystallization and provides a permanent shine even when cold.
The Complete Hot Fudge Sundae Brownie Cheesecake Recipe
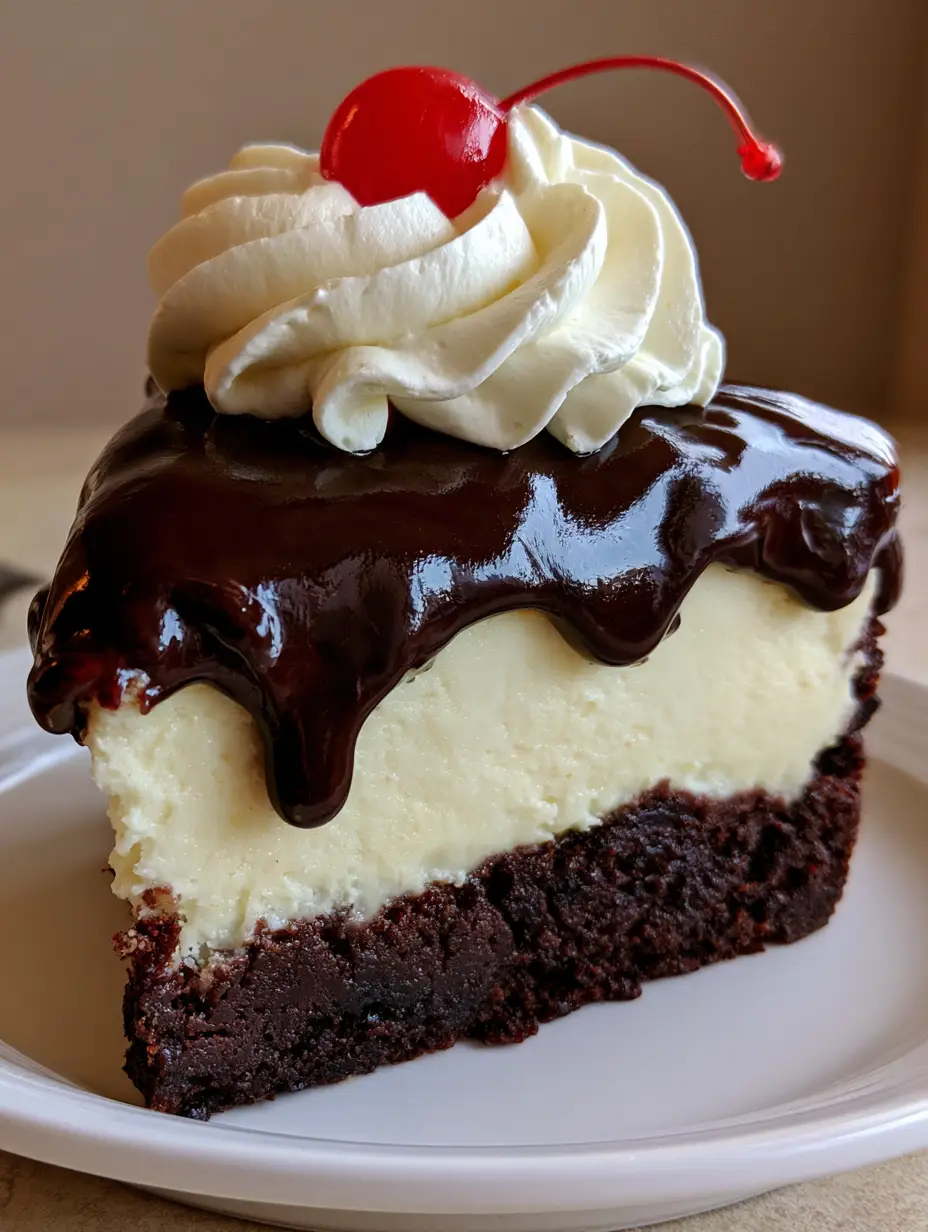
Hot Fudge Sundae Brownie Cheesecake: The Ultimate Triple-Layer Dessert Guide
Ingredients
Equipment
Method
- Mix melted butter, sugar, and cocoa. Add eggs, then fold in flour and salt.
- Bake at 325°F (165°C) for 15-18 minutes in a springform pan.
- Cream the cheese and sugar. Add sour cream and vanilla, then add eggs one at a time.
- Pour over brownie and bake at 300°F (150°C) for 50-60 minutes.
- Melt cream, chocolate, and syrup. Pour over chilled cheesecake.
- Pipe whipped cream swirls and top each with a maraschino cherry.
Notes
Chill for at least 6 hours before slicing for clean side views.
Share Your Culinary Creation!
There is nothing quite like the satisfaction of slicing into a Hot Fudge Sundae Brownie Cheesecake and seeing those perfect, distinct layers. This recipe is a testament to how professional techniques can bring a visual blueprint to life in your own kitchen. If you enjoyed this recipe, please leave a comment below and tell us how your layers turned out!
Don’t forget to take a photo of your masterpiece and share it with us. For more visually stunning recipe inspiration, be sure to follow us on Pinterest and save this recipe to your “Ultimate Desserts” board. Happy baking!