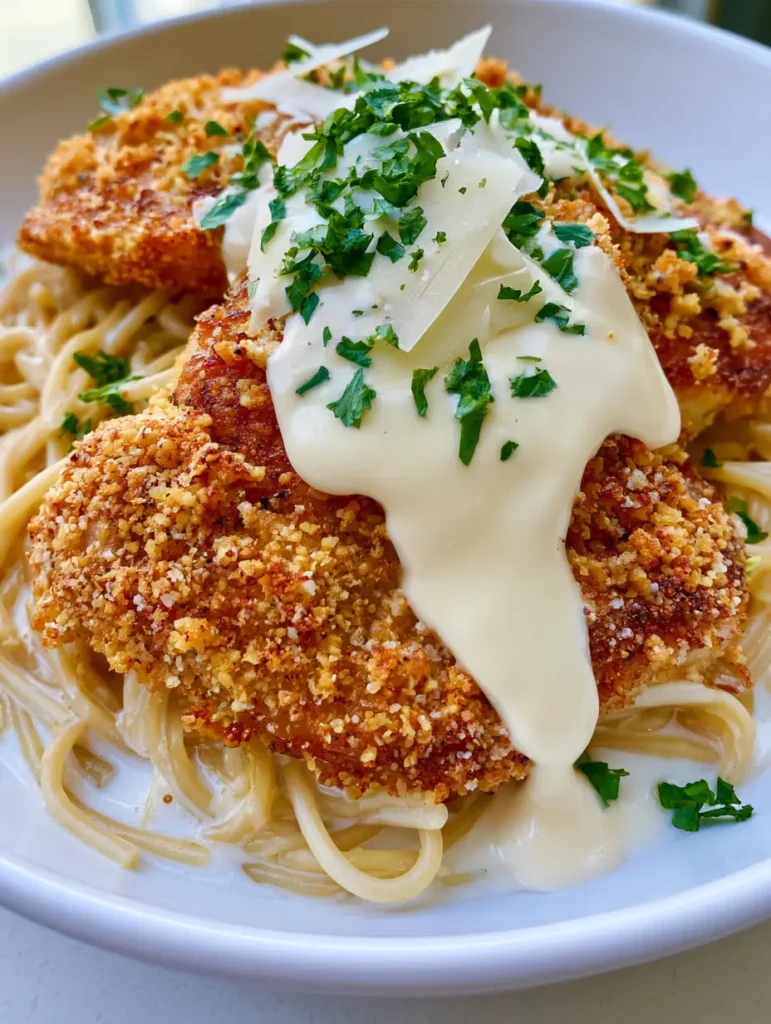
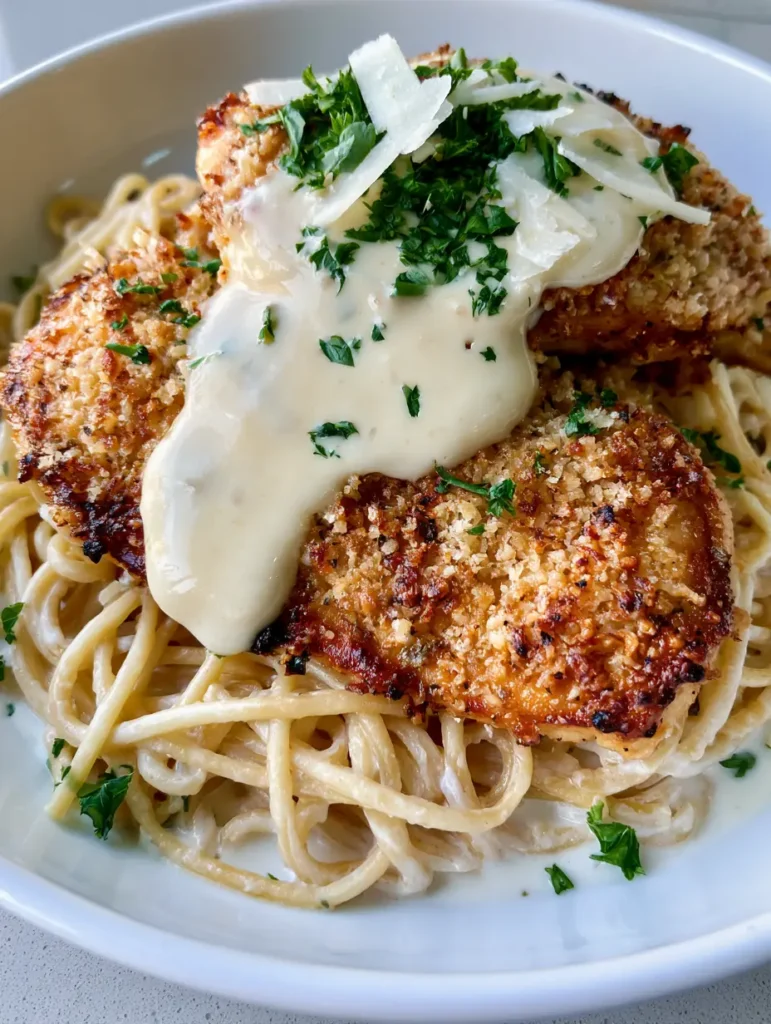
There is something undeniably magnetic about a perfectly executed Chicken Romano Recipe. It is a dish that commands attention the moment it hits the table, with its wide, flat chicken breasts boasting a thick, textured crust of golden-brown breadcrumbs and sharp, salty Romano cheese. When you slice into that crunchy exterior, you are met with tender, juicy meat that creates a spectacular contrast against a bed of al dente spaghetti tossed in a shimmering, opaque ivory cream sauce.
This recipe isn’t just about feeding a family; it is about recreating that “handheld smartphone photo” aesthetic where the natural daylight catches every seared edge and every fleck of bright green parsley. By following this professional culinary guide, you will master the art of the perfect Romano dredge and the science of a stabilized heavy cream reduction that clings to every strand of pasta without being heavy or cloying.
Whether you are a seasoned home cook or looking to elevate your weeknight rotation, this version of Chicken Romano delivers a restaurant-quality profile that rivals your favorite creamy chicken pasta dishes. The secret lies in the balance of the pungent Pecorino Romano and the delicate drizzle of sauce that ties the golden chicken to the silky pasta base.
What Makes This Chicken Romano Recipe Truly Exceptional
- The Signature Texture: Unlike standard breaded chicken, this crust is specifically engineered with a high ratio of grated Romano cheese to Panko, ensuring a deep, nutty flavor and a visible, rustic texture.
- Visual Precision: We pound the chicken breasts until they are wide and flat, ensuring even cooking and a stunning presentation that covers the plate, just like the professional visual blueprint.
- The Ivory Sauce: A simmered heavy cream sauce that is smooth, opaque, and ivory-colored, designed to provide a moistening element without drowning the crispy integrity of the chicken.
- Garnish Contrast: The addition of finely chopped fresh parsley and thin shavings of hard white cheese adds layers of freshness and luxury to the final plating.
Essential Elements for the Perfect Romano Breadstation
To achieve the specific golden-brown crust required for a top-tier Chicken Romano Recipe, you need ingredients that react correctly to high-heat pan-searing. The foundational components below are non-negotiable for culinary success.
Boneless, Skinless Chicken Breasts: Look for 2 large breasts (about 1 lb / 450g) that we will butterfly and pound. This creates the “wide and flat” appearance described in the visual prompt and ensures the chicken cooks at the same rate as the cheese crust browns.
Pecorino Romano Cheese: You will need 1 cup (110g) of finely grated Romano. Its higher salt content and sheep’s milk tang provide a much sharper profile than Parmesan, which is essential for that authentic Romano bite.
Panko Breadcrumbs: 1/2 cup (60g) provides the “thick, textured” look. Traditional breadcrumbs are too fine; Panko creates those jagged, seared edges that catch the natural light in photos.
All-Purpose Flour: 1/2 cup (65g) seasoned with salt and pepper. This initial coating absorbs surface moisture, allowing the egg wash to adhere perfectly so your crust doesn’t slide off in the pan.
Large Eggs: 2 eggs, beaten thoroughly. The egg proteins act as the glue between the flour-dusted meat and the heavy Romano-crumb mixture.
Heavy Cream: 1 cup (240ml) for the sauce. We use heavy cream because it reduces into a smooth, opaque ivory sauce without the need for thickeners that can make the sauce look chalky.
Spaghetti: 8 oz (225g) of dried pasta. Boiling this to a true al dente provides the necessary structural base for the bed of noodles.
Invisible Essentials: You will need 3 tbsp (45ml) of high-smoke point olive oil for searing and 2 tbsp (30g) of unsalted butter for finishing the sauce. These provide the fat necessary for the “seared edges” look.
Required Tools for Professional Results
Achieving a restaurant-quality Chicken Romano Recipe requires a few specific kitchen tools. A heavy-bottomed stainless steel or cast-iron skillet is mandatory for creating that even, golden-brown sear across the wide surface of the chicken.
You will also need a meat mallet or a heavy rolling pin to flatten the chicken. A set of three shallow bowls for your dredging station will keep the process organized and prevent the “club hand” effect where breading builds up on your fingers. Lastly, a microplane or vegetable peeler is needed to create those “thin shavings of hard white cheese” that garnish the final dish.
The Step-by-Step Path to Golden Romano Perfection
Preparing the Chicken for the Pan
Start by butterflying your chicken breasts. Place your hand flat on top of the breast and carefully slice horizontally through the middle, stopping just before you cut all the way through. Open it like a book.
Place the chicken between two sheets of plastic wrap. Using the flat side of a meat mallet, gently but firmly pound the chicken from the center outward until it is consistently 1/2 inch (1.25cm) thick. This ensures the chicken is wide and flat, maximizing the surface area for that delicious Romano crust.
The Triple-Dredge Technique
Set up three bowls. In the first, mix your flour with a pinch of salt and pepper. In the second, whisk the eggs with a splash of water. In the third, combine the grated Romano cheese and Panko breadcrumbs.
Dredge each piece of chicken in the flour, shaking off the excess. Dip into the egg wash, ensuring full coverage, then press firmly into the Romano-crumb mixture. You want a thick, textured coating that completely hides the meat. Let the breaded chicken rest for 5 minutes; this “sets” the crust so it stays intact during searing.
Searing for the Visual Gold Standard
Heat your olive oil in the skillet over medium-high heat. You will know the oil is ready when it shimmers. Carefully lay the chicken into the pan, laying it away from you to avoid splashes.
Sear the chicken for 3-4 minutes per side. Do not move the chicken once it hits the pan! You are looking for a deep, golden-brown crust and visible seared edges. The smell should be nutty and toasted. Once cooked through, remove the chicken to a wire rack to keep the bottom crispy while you prepare the sauce.
Crafting the Silky Ivory Cream Sauce
In the same pan (after wiping out excess oil but keeping the flavorful brown bits), pour in the heavy cream. Bring it to a gentle simmer over medium heat. Whisk constantly as the cream reduces and thickens.
Once the sauce is opaque and coats the back of a spoon, whisk in a tablespoon of butter for a glossy finish. This thin white cream sauce should be rich but fluid enough to coat the spaghetti noodles without clumping.
Expert Tips for Success
- Keep it Crispy: Never pour the sauce directly over the entire piece of chicken. Drizzle it strategically as per the visual prompt so the majority of the Romano crust stays crunchy.
- Pasta Timing: Drop your spaghetti into the boiling water at the same time the chicken hits the skillet. This ensures the noodles are fresh and hot when the sauce is ready.
- Cheese Quality: Use freshly grated Pecorino Romano. Pre-shredded cheese is coated in potato starch, which prevents it from melting and bonding correctly to the breadcrumbs.
- Temperature Control: If the cheese starts to brown too quickly before the chicken is cooked, lower the heat to medium. A burnt crust is bitter, while a golden-brown crust is sweet and savory.
What to Serve With Your Chicken Romano
This dish is a complete meal on its own, but it pairs beautifully with light, acidic sides to cut through the richness of the cream sauce. A simple arugula salad with a lemon vinaigrette is a classic choice.
If you are looking for more adventurous pairings, consider serving this alongside a tray of roasted peppers for a fusion twist, or even a side of cowboy butter for dipping the crust. For those who enjoy varied textures, a small bowl of savory rice can actually complement the Romano flavors surprisingly well.
Frequently Asked Questions
You can, but the sauce will be thinner and less ‘opaque ivory’ in color. If using milk, you will need to create a roux (butter and flour) first to achieve the correct coating consistency.
The key is the flour dredge and the resting period. Dusting the chicken in flour first creates a dry surface for the egg to stick to, and letting the breaded chicken rest for 5 minutes before frying allows the proteins to bond.
Chicken Romano uses Pecorino Romano cheese, which is made from sheep’s milk and is saltier and tangier than the cow’s milk Parmesan used in Chicken Parm. Additionally, Romano is typically served with a cream sauce rather than marinara.
Always look for ‘Pecorino Romano’ for the most authentic flavor. Avoid the pre-grated cheese in green cans; you want a wedge that you grate yourself for maximum melt and flavor.
Pounding the chicken to a 1/2 inch thickness ensures it cooks quickly and evenly, preventing the cheese crust from burning before the center of the meat is safely cooked.
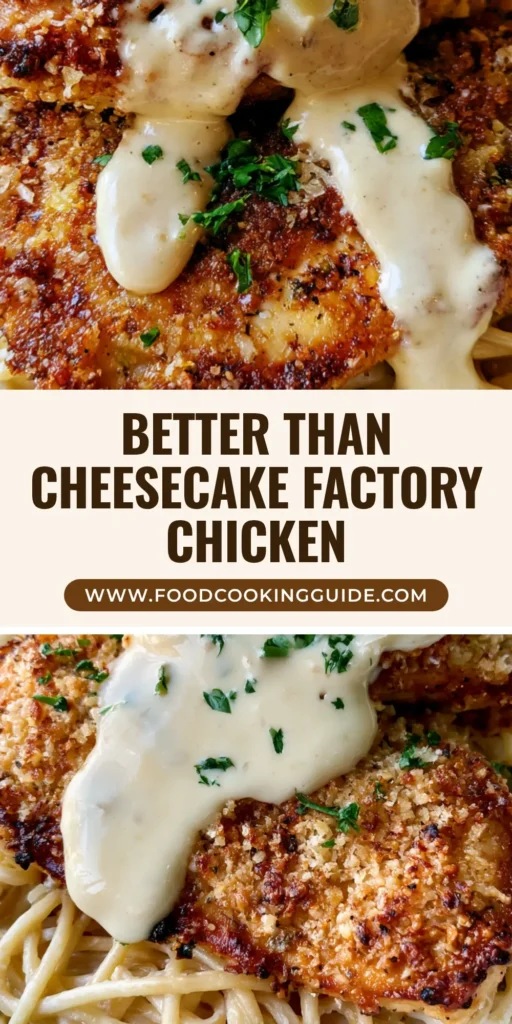
The Ultimate Chicken Romano Recipe Card
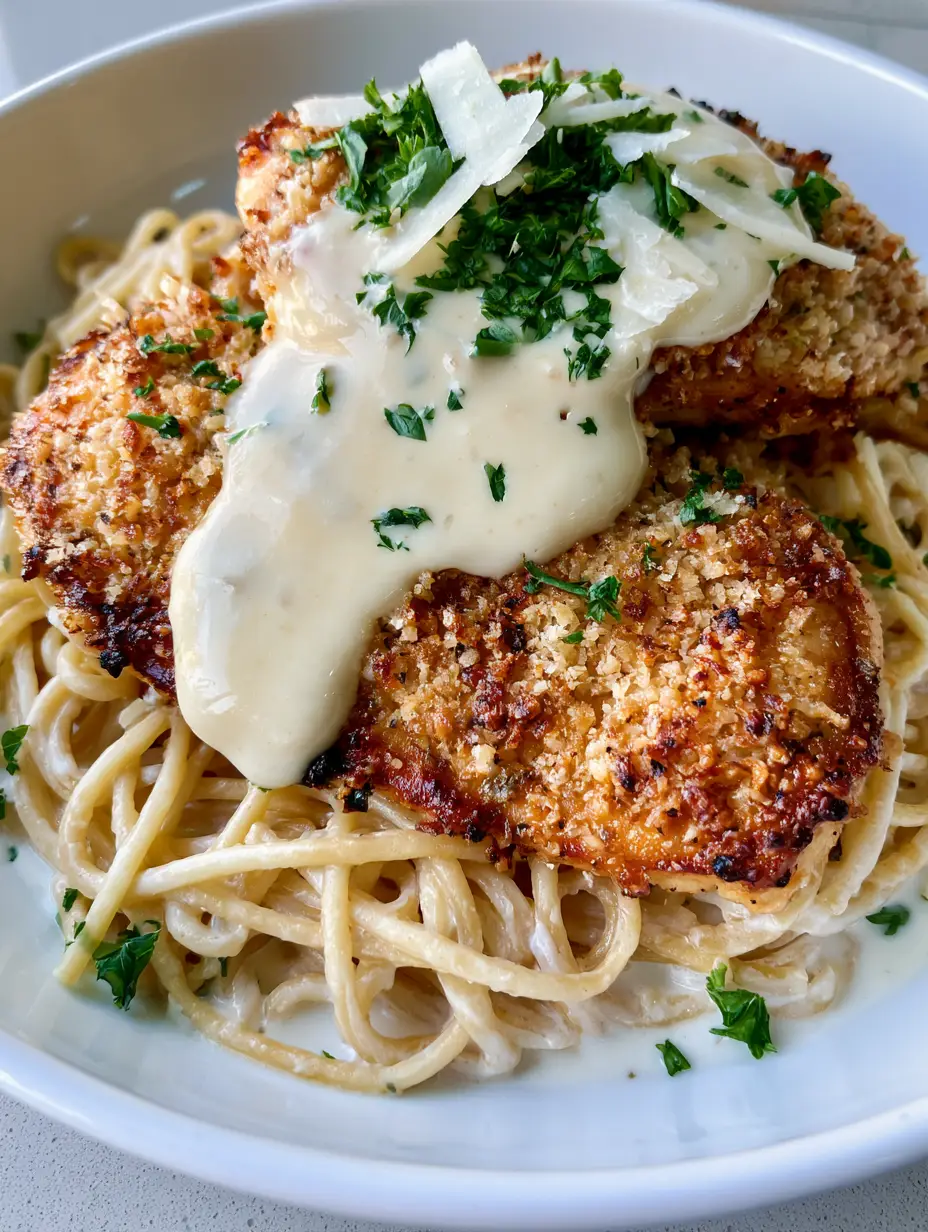
Chicken Romano Recipe: The Ultimate Crispy Golden Crust Experience
Ingredients
Equipment
Method
- Butterfly and pound the chicken breasts between plastic wrap to 1/2 inch thickness until wide and flat.
- Coat chicken in seasoned flour, dip in beaten eggs, and press firmly into the Romano and Panko mixture.
- Heat oil in a skillet over medium-high. Sear chicken for 3-4 minutes per side until a deep golden-brown crust forms with visible seared edges.
- Boil spaghetti in salted water until al dente. Reserve a small amount of pasta water.
- Simmer heavy cream in the skillet until reduced to an opaque ivory color. Whisk in butter and toss with the cooked spaghetti.
- Place chicken over the pasta bed, drizzle with sauce, and garnish with parsley and cheese shavings.
Notes
Pounding the chicken to an even thickness is the secret to juicy meat and a crisp exterior.
Storage, Reheating, and Make-Ahead Advice
If you have leftovers, store the chicken and pasta separately in airtight containers. The Chicken Romano Recipe is best enjoyed fresh, but it will keep in the refrigerator for up to 3 days. The sauce may thicken significantly when cold; simply add a splash of milk or water when reheating.
To reheat the chicken while maintaining the crust, avoid the microwave. Instead, place the chicken on a baking sheet in a 350°F (175°C) oven for 8-10 minutes. This will recrisp the Romano coating. The pasta can be tossed in a pan over low heat with a little extra cream to bring the sauce back to life.
Final Thoughts on This Italian Classic
This Chicken Romano Recipe represents the pinnacle of home-cooked Italian-American comfort. It balances the high-impact crunch of a Romano crust with the sophisticated simplicity of an ivory cream sauce. By focusing on the visual cues—the golden hue, the seared edges, and the fresh parsley garnish—you create a dish that satisfies both the eyes and the palate.
We would love to see your results! Please leave a comment below and share your photos with us. Don’t forget to follow our Pinterest for more culinary inspiration and save this recipe to your “Dinner Goals” board!